Quickstart: Ionic React
Intro
This example provides the steps to build a simple user management app (from scratch!) using Supabase and Ionic React. It includes:
- Supabase Database: a Postgres database for storing your user data.
- Supabase Auth: users can sign in with magic links (no passwords, only email).
- Supabase Storage: users can upload a photo.
- Row Level Security: data is protected so that individuals can only access their own data.
- Instant APIs: APIs will be automatically generated when you create your database tables.
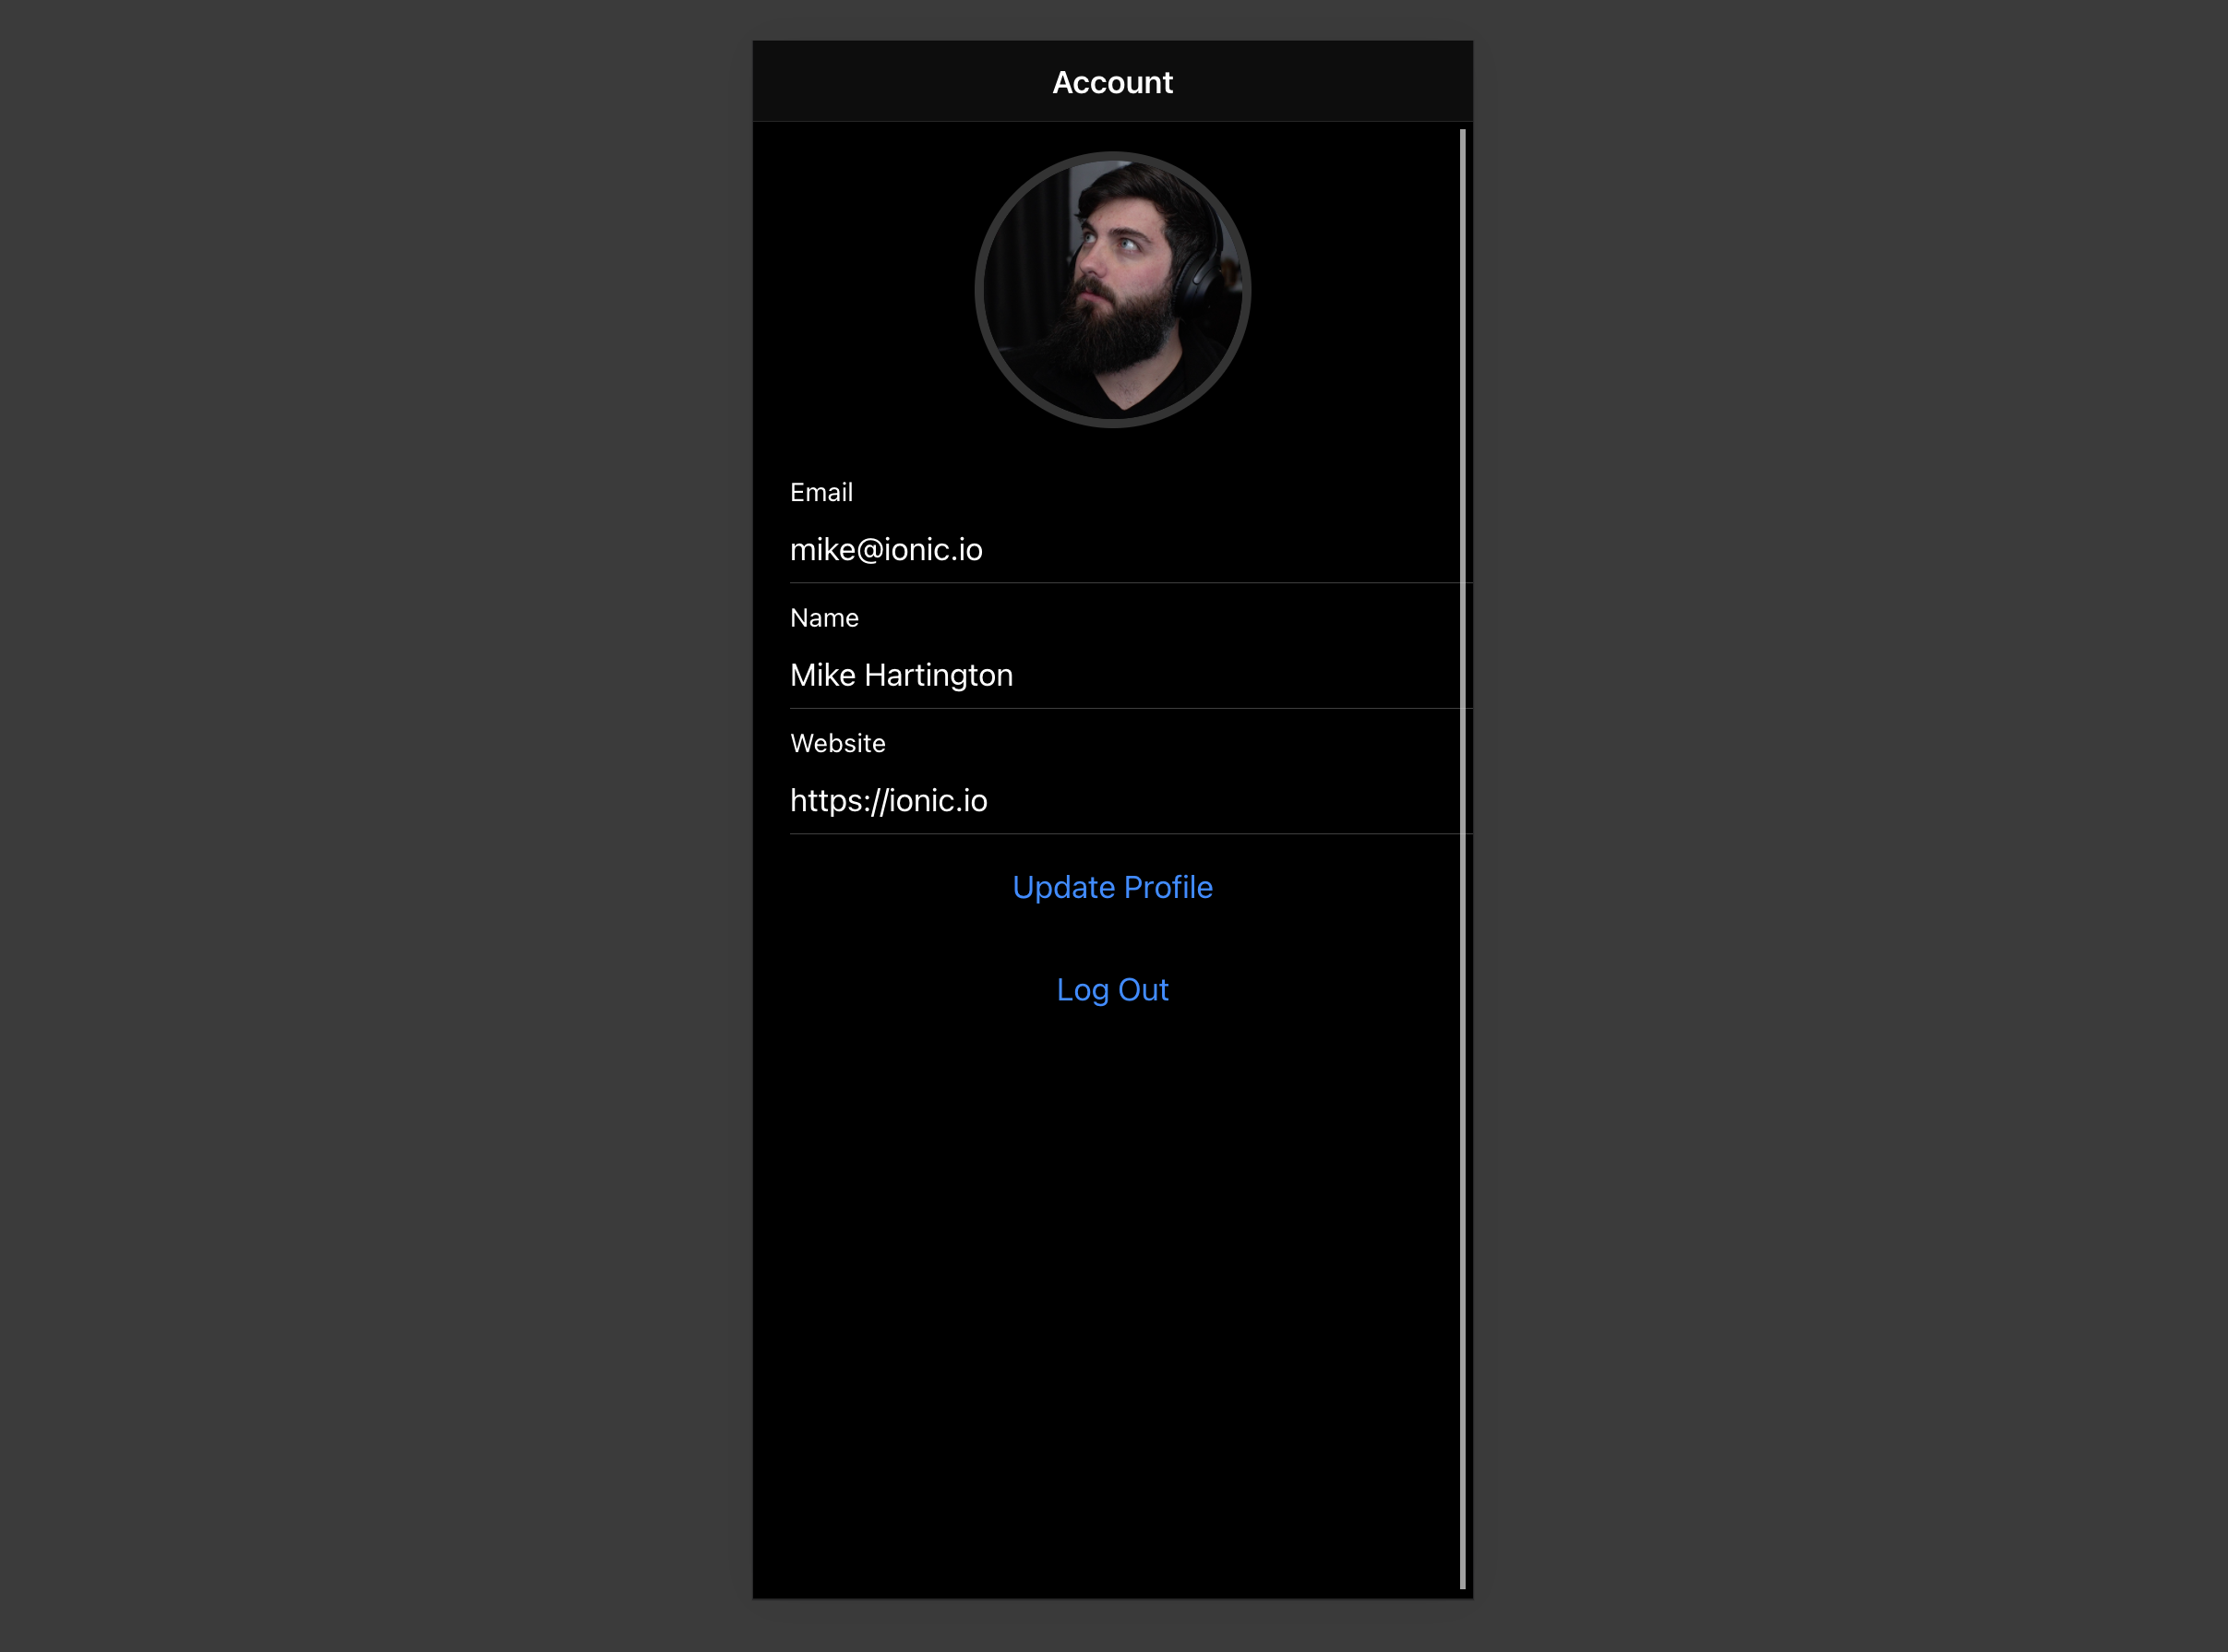
By the end of this guide you'll have an app which allows users to login and update some basic profile details:
Clicking this button the application will:
- Launch and prepare the Postgres database in Supabase.
- Launch the app in Vercel.
- Fork the example into your own GitHub account.
- Prepare the deployed application with all the necessary environment variables.
If you want to do it yourself, let's get started!
GitHub
Whenever you get stuck at any point, take a look at this repo.
Project set up
Before we start building we're going to set up our Database and API. This is as simple as starting a new Project in Supabase and then creating a "schema" inside the database.
Create a project
- Go to app.supabase.com.
- Click on "New Project".
- Enter your project details.
- Wait for the new database to launch.
Set up the database schema
Now we are going to set up the database schema. We can use the "User Management Starter" quickstart in the SQL Editor, or you can just copy/paste the SQL from below and run it yourself.
- Dashboard
- SQL
- Go to the SQL Editor page in the Dashboard.
- Click User Management Starter.
- Click Run.
-- Create a table for public "profiles"
create table profiles (
  id uuid references auth.users not null,
  updated_at timestamp with time zone,
  username text unique,
  avatar_url text,
  website text,

  primary key (id),
  unique(username),
  constraint username_length check (char_length(username) >= 3)
);

alter table profiles enable row level security;

create policy "Public profiles are viewable by everyone."
  on profiles for select
  using ( true );

create policy "Users can insert their own profile."
  on profiles for insert
  with check ( auth.uid() = id );

create policy "Users can update own profile."
  on profiles for update
  using ( auth.uid() = id );

-- Set up Realtime!
begin;
  drop publication if exists supabase_realtime;
  create publication supabase_realtime;
commit;
alter publication supabase_realtime add table profiles;

-- Set up Storage!
insert into storage.buckets (id, name)
values ('avatars', 'avatars');

create policy "Avatar images are publicly accessible."
  on storage.objects for select
  using ( bucket_id = 'avatars' );

create policy "Anyone can upload an avatar."
  on storage.objects for insert
  with check ( bucket_id = 'avatars' );
Get the API Keys
Now that you've created some database tables, you are ready to insert data using the auto-generated API.
We just need to get the URL and anon key from the API settings.
- Go to the Settings page in the Dashboard.
- Click API in the sidebar.
- Find your API
URL,anon, andservice_rolekeys on this page.
Building the App
Let's start building the React app from scratch.
Initialize an Ionic React app
We can use the Ionic CLI to initialize
an app called supabase-ionic-react:
npm install -g @ionic/cli
ionic start supabase-ionic-react blank --type react
cd supabase-ionic-react
Then let's install the only additional dependency: supabase-js
npm install @supabase/supabase-js
And finally we want to save the environment variables in a .env.
All we need are the API URL and the anon key that you copied earlier.
REACT_APP_SUPABASE_URL=YOUR_SUPABASE_URL
REACT_APP_SUPABASE_ANON_KEY=YOUR_SUPABASE_ANON_KEY
Now that we have the API credentials in place, let's create a helper file to initialize the Supabase client. These variables will be exposed on the browser, and that's completely fine since we have Row Level Security enabled on our Database.
import { createClient } from '@supabase/supabase-js'

const supabaseUrl = process.env.REACT_APP_SUPABASE_URL
const supabaseAnonKey = process.env.REACT_APP_SUPABASE_ANON_KEY

export const supabase = createClient(supabaseUrl, supabaseAnonKey)
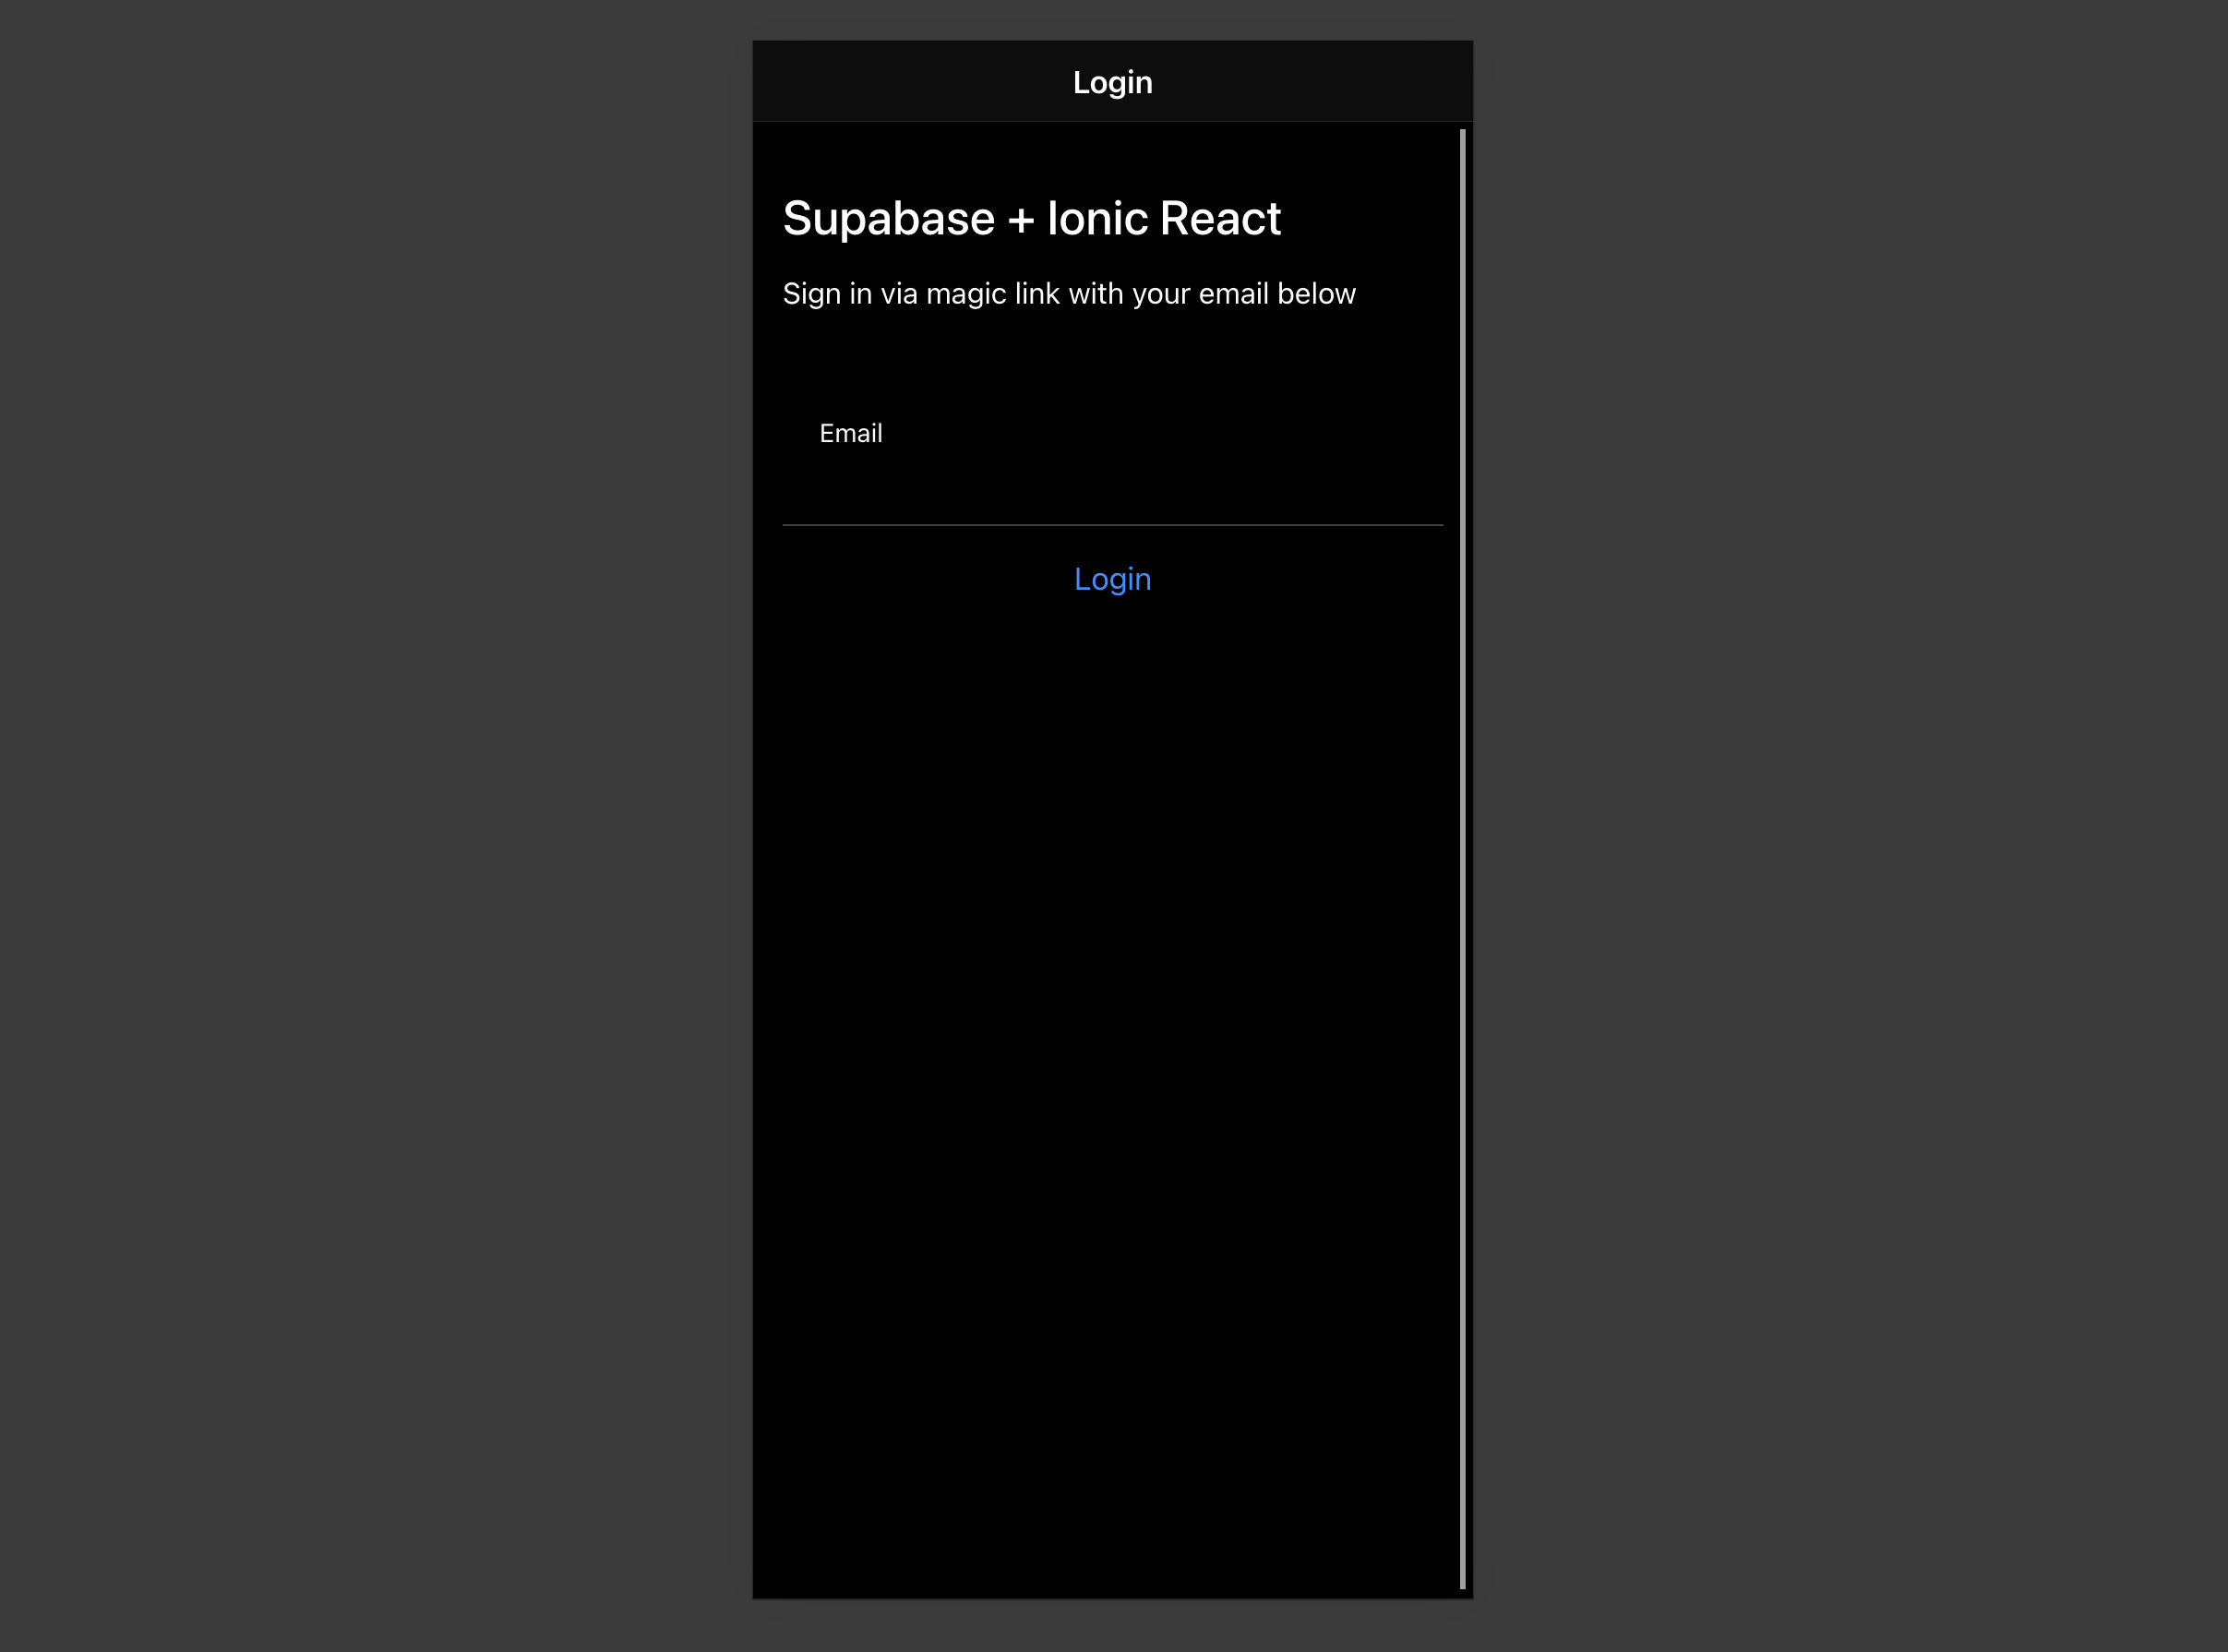
Set up a Login route
Let's set up a React component to manage logins and sign ups. We'll use Magic Links, so users can sign in with their email without using passwords.
import { useState } from 'react';
import {
  IonButton,
  IonContent,
  IonHeader,
  IonInput,
  IonItem,
  IonLabel,
  IonList,
  IonPage,
  IonTitle,
  IonToolbar,
  useIonToast,
  useIonLoading,
} from '@ionic/react';
import { supabase } from '../supabaseClient';

export function LoginPage() {
  const [email, setEmail] = useState('');

  const [showLoading, hideLoading] = useIonLoading();
  const [showToast ] = useIonToast();
  const handleLogin = async (e: React.FormEvent<HTMLFormElement>) => {
    console.log()
    e.preventDefault();
    await showLoading();
    try {
      await supabase.auth.signIn({ email });
      await showToast({ message: 'Check your email for the login link!' });
    } catch (e: any) {
      await showToast({ message: e.error_description || e.message , duration: 5000});
    } finally {
      await hideLoading();
    }
  };
  return (
    <IonPage>
      <IonHeader>
        <IonToolbar>
          <IonTitle>Login</IonTitle>
        </IonToolbar>
      </IonHeader>

      <IonContent>
        <div className="ion-padding">
          <h1>Supabase + Ionic React</h1>
          <p>Sign in via magic link with your email below</p>
        </div>
        <IonList inset={true}>
          <form onSubmit={handleLogin}>
            <IonItem>
              <IonLabel position="stacked">Email</IonLabel>
              <IonInput
                value={email}
                name="email"
                onIonChange={(e) => setEmail(e.detail.value ?? '')}
                type="email"
              ></IonInput>
            </IonItem>
            <div className="ion-text-center">
              <IonButton type="submit" fill="clear">
                Login
              </IonButton>
            </div>
          </form>
        </IonList>
      </IonContent>
    </IonPage>
  );
}
Account page
After a user is signed in we can allow them to edit their profile details and manage their account.
Let's create a new component for that called Account.tsx.
import {
  IonButton,
  IonContent,
  IonHeader,
  IonInput,
  IonItem,
  IonLabel,
  IonPage,
  IonTitle,
  IonToolbar,
  useIonLoading,
  useIonToast,
  useIonRouter
} from '@ionic/react';
import { useEffect, useState } from 'react';
import { supabase } from '../supabaseClient';

export function AccountPage() {
  const [showLoading, hideLoading] = useIonLoading();
  const [showToast] = useIonToast();
  const [session] = useState(() => supabase.auth.session());
  const router = useIonRouter();
  const [profile, setProfile] = useState({
    username: '',
    website: '',
    avatar_url: '',
  });
  useEffect(() => {
    getProfile();
  }, [session]);
  const getProfile = async () => {
    console.log('get');
    await showLoading();
    try {
      const user = supabase.auth.user();
      let { data, error, status } = await supabase
        .from('profiles')
        .select(`username, website, avatar_url`)
        .eq('id', user!.id)
        .single();

      if (error && status !== 406) {
        throw error;
      }

      if (data) {
        setProfile({
          username: data.username,
          website: data.website,
          avatar_url: data.avatar_url,
        });
      }
    } catch (error: any) {
      showToast({ message: error.message, duration: 5000 });
    } finally {
      await hideLoading();
    }
  };
  const signOut = async () => {
    await supabase.auth.signOut();
    router.push('/', 'forward', 'replace');
  }
  const updateProfile = async (e?: any, avatar_url: string = '') => {
    e?.preventDefault();

    console.log('update ');
    await showLoading();

    try {
      const user = supabase.auth.user();

      const updates = {
        id: user!.id,
        ...profile,
        avatar_url: avatar_url,
        updated_at: new Date(),
      };

      let { error } = await supabase.from('profiles').upsert(updates, {
        returning: 'minimal', // Don't return the value after inserting
      });

      if (error) {
        throw error;
      }
    } catch (error: any) {
      showToast({ message: error.message, duration: 5000 });
    } finally {
      await hideLoading();
    }
  };
  return (
    <IonPage>
      <IonHeader>
        <IonToolbar>
          <IonTitle>Account</IonTitle>
        </IonToolbar>
      </IonHeader>

      <IonContent>
        <form onSubmit={updateProfile}>
          <IonItem>
            <IonLabel>
              <p>Email</p>
              <p>{session?.user?.email}</p>
            </IonLabel>
          </IonItem>

          <IonItem>
            <IonLabel position="stacked">Name</IonLabel>
            <IonInput
              type="text"
              name="username"
              value={profile.username}
              onIonChange={(e) =>
                setProfile({ ...profile, username: e.detail.value ?? '' })
              }
            ></IonInput>
          </IonItem>

          <IonItem>
            <IonLabel position="stacked">Website</IonLabel>
            <IonInput
              type="url"
              name="website"
              value={profile.website}
              onIonChange={(e) =>
                setProfile({ ...profile, website: e.detail.value ?? '' })
              }
            ></IonInput>
          </IonItem>
          <div className="ion-text-center">
            <IonButton fill="clear" type="submit">
              Update Profile
            </IonButton>
          </div>
        </form>

        <div className="ion-text-center">
          <IonButton fill="clear" onClick={signOut}>
            Log Out
          </IonButton>
        </div>
      </IonContent>
    </IonPage>
  );
}
Launch!
Now that we have all the components in place, let's update App.tsx:
import { Redirect, Route } from 'react-router-dom';
import { IonApp, IonRouterOutlet, setupIonicReact } from '@ionic/react';
import { IonReactRouter } from '@ionic/react-router';
import { supabase } from './supabaseClient';

import '@ionic/react/css/ionic.bundle.css';

/* Theme variables */
import './theme/variables.css';
import { LoginPage } from './pages/Login';
import { AccountPage } from './pages/Account';
import { useEffect, useState } from 'react';
import { Session } from '@supabase/supabase-js';

setupIonicReact();

const App: React.FC = () => {
  const [session, setSession] = useState<Session | null>(null);
  useEffect(() => {
    setSession(supabase.auth.session());
    supabase.auth.onAuthStateChange((_event, session) => {
      setSession(session);
    });
  }, [session]);
  return (
    <IonApp>
      <IonReactRouter>
        <IonRouterOutlet>
          <Route
            exact
            path="/"
            render={() => {
              return session ? <Redirect to="/account" /> : <LoginPage />;
            }}
          />
          <Route exact path="/account">
            <AccountPage />
          </Route>
        </IonRouterOutlet>
      </IonReactRouter>
    </IonApp>
  );
};

export default App;
Once that's done, run this in a terminal window:
ionic serve
And then open the browser to localhost:3000 and you should see the completed app.
Bonus: Profile photos
Every Supabase project is configured with Storage for managing large files like photos and videos.
Create an upload widget
First install two packages in order to interact with the user's camera.
npm install @ionic/pwa-elements @capacitor/camera
CapacitorJS is a cross platform native runtime from Ionic that enables web apps to be deployed through the app store and provides access to native deavice API.
Ionic PWA elements is a companion package that will polyfill certain browser APIs that provide no user interface with custom Ionic UI.
With those packages installed we can update our index.tsx to include an additional bootstapping call for the Ionic PWA Elements.
import React from 'react';
import ReactDOM from 'react-dom';
import App from './App';
import * as serviceWorkerRegistration from './serviceWorkerRegistration';
import reportWebVitals from './reportWebVitals';

import {defineCustomElements} from '@ionic/pwa-elements/loader';
defineCustomElements(window);

ReactDOM.render(
  <React.StrictMode>
    <App />
  </React.StrictMode>,
  document.getElementById('root')
);

serviceWorkerRegistration.unregister();
reportWebVitals();
Then create an AvatarComponent.
import { IonIcon } from '@ionic/react';
import { person } from 'ionicons/icons';
import { Camera, CameraResultType } from '@capacitor/camera';
import { useEffect, useState } from 'react';
import { supabase } from '../supabaseClient';
import './Avatar.css'
export function Avatar({
  url,
  onUpload,
}: {
  url: string;
  onUpload: (e: any, file: string) => Promise<void>;
}) {
  const [avatarUrl, setAvatarUrl] = useState<string | undefined>();

  useEffect(() => {
    if (url) {
      downloadImage(url);
    }
  }, [url]);
  const uploadAvatar = async () => {
    try {
      const photo = await Camera.getPhoto({
        resultType: CameraResultType.DataUrl,
      });

      const file = await fetch(photo.dataUrl!)
        .then((res) => res.blob())
        .then(
          (blob) =>
            new File([blob], 'my-file', { type: `image/${photo.format}` })
        );

      const fileName = `${Math.random()}-${new Date().getTime()}.${
        photo.format
      }`;
      let { error: uploadError } = await supabase.storage
        .from('avatars')
        .upload(fileName, file);
      if (uploadError) {
        throw uploadError;
      }
      onUpload(null, fileName);
    } catch (error) {
      console.log(error);
    }
  };

  const downloadImage = async (path: string) => {
    try {
      const { data, error } = await supabase.storage
        .from('avatars')
        .download(path);
      if (error) {
        throw error;
      }
      const url = URL.createObjectURL(data!);
      setAvatarUrl(url);
    } catch (error: any) {
      console.log('Error downloading image: ', error.message);
    }
  };

  return (
    <div className="avatar">
    <div className="avatar_wrapper" onClick={uploadAvatar}>
      {avatarUrl ? (
        <img src={avatarUrl} />
      ) : (
        <IonIcon icon={person} className="no-avatar" />
      )}
    </div>

    </div>
  );
}
Add the new widget
And then we can add the widget to the Account page:
// Import the new component

import { Avatar } from '../components/Avatar';

// ...
return (
  <IonPage>
    <IonHeader>
      <IonToolbar>
        <IonTitle>Account</IonTitle>
      </IonToolbar>
    </IonHeader>

    <IonContent>
      <Avatar url={profile.avatar_url} onUpload={updateProfile}></Avatar>
Next steps
At this stage you have a fully functional application!
- Got a question? Ask here.
- Sign in: app.supabase.com