Dashibase
Let’s build an app together!
This guide walks you through how to build a CRM for superheroes using Supabase on the backend and Dashibase on the front.
Dashibase is a lightning-fast way to build your app dashboard so that your end users can manage their data. You get a full dashboard UI right out of the box. Not boilerplate code. Not drag-and-drop. Not individual components.
Step 1. Write down your idea
Let’s say we want to build a CRM for Marvel Cinematic Universe. With the multiverse, the superheroes would need a CRM to stay in touch.
Here is the information we want our users to store in our app:
- Name
- Universe
- Last contacted date
- Relationship: Never met, Acquaintance, Close
- Can he/she fly?
- History
Step 2. Set up your Supabase project
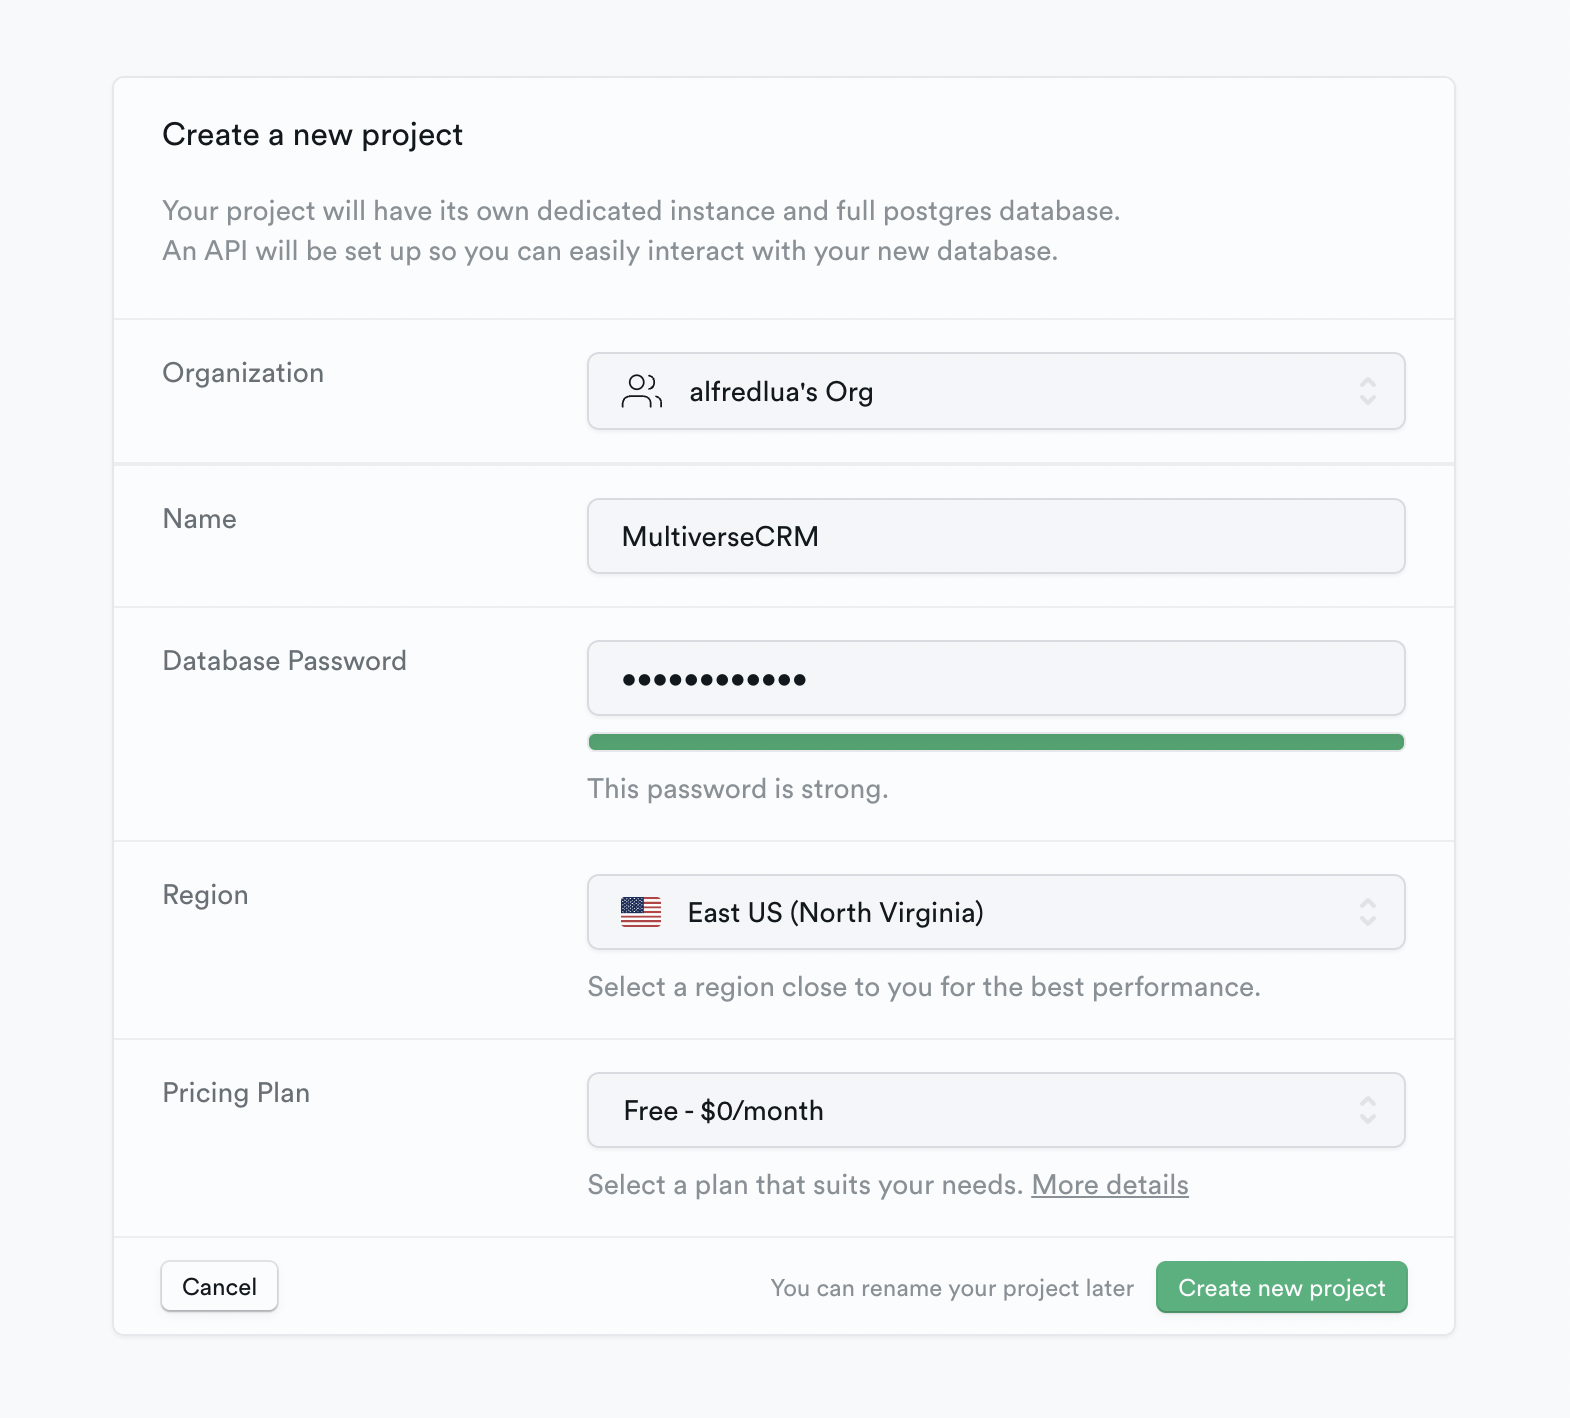
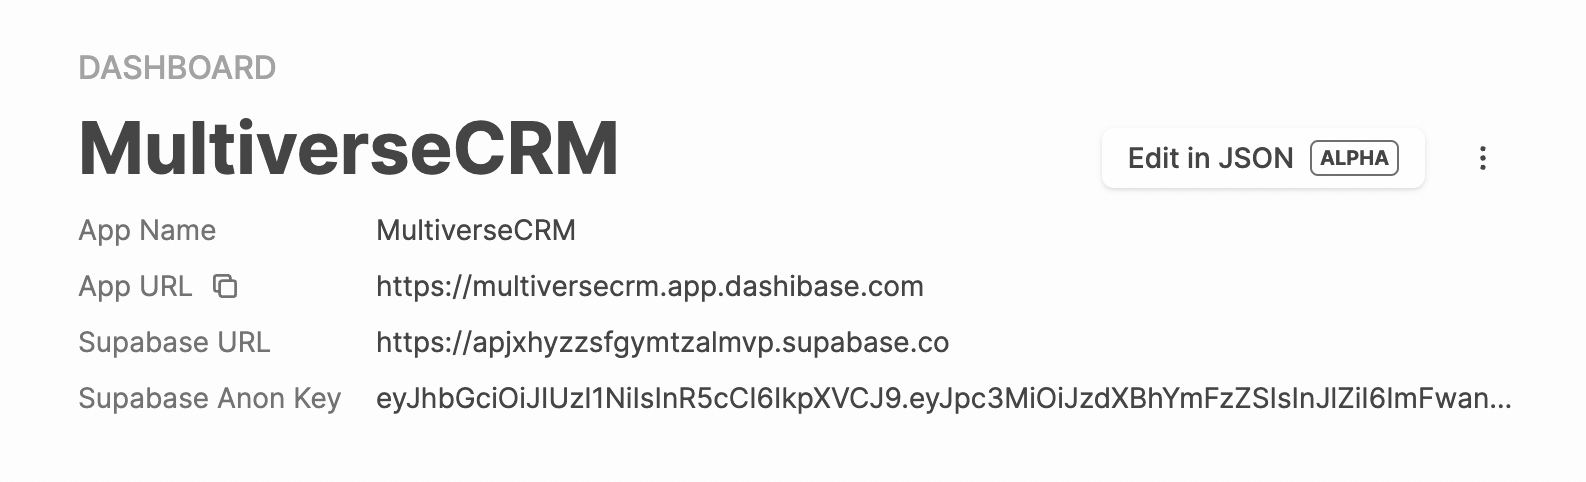
First, sign up for a Supabase account and create a new project. We are naming our project MultiverseCRM.
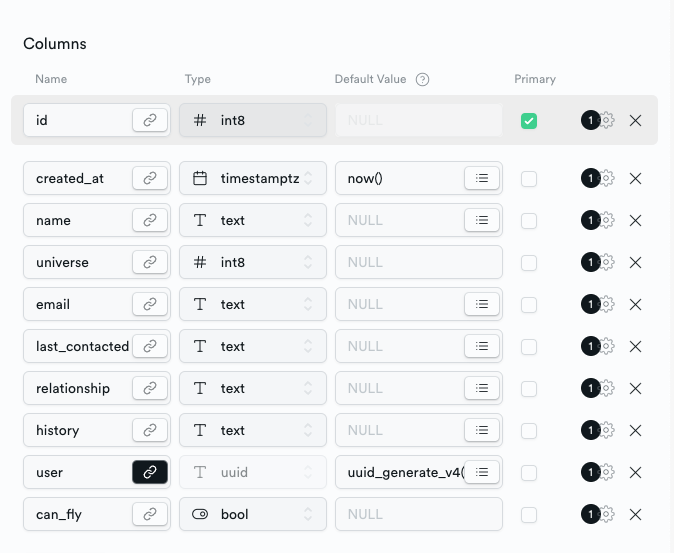
Next, set up the table for our data. Our table is called ‘contacts'.
To store the various information we want, we need to set up the following columns:
- Name (text)
- Universe (int4)
- Email (text)
- Last contacted date (date)
- Relationship: Never met, Acquaintance, Close (text)
- Can he/she fly? (boolean)
- History (text)
We also need a user column, which is a foreign key to the auth.users table so that we can keep track of which user these contacts belong to. To do that, add another column, name it ‘user’, and click on the chainlink button to add the foreign key relation. Then, select ‘users’ and ‘id’.
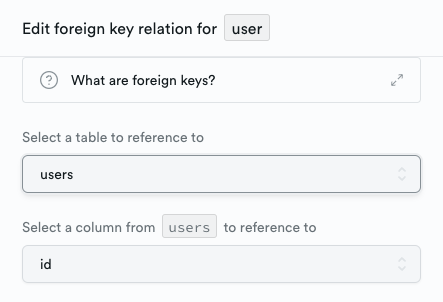
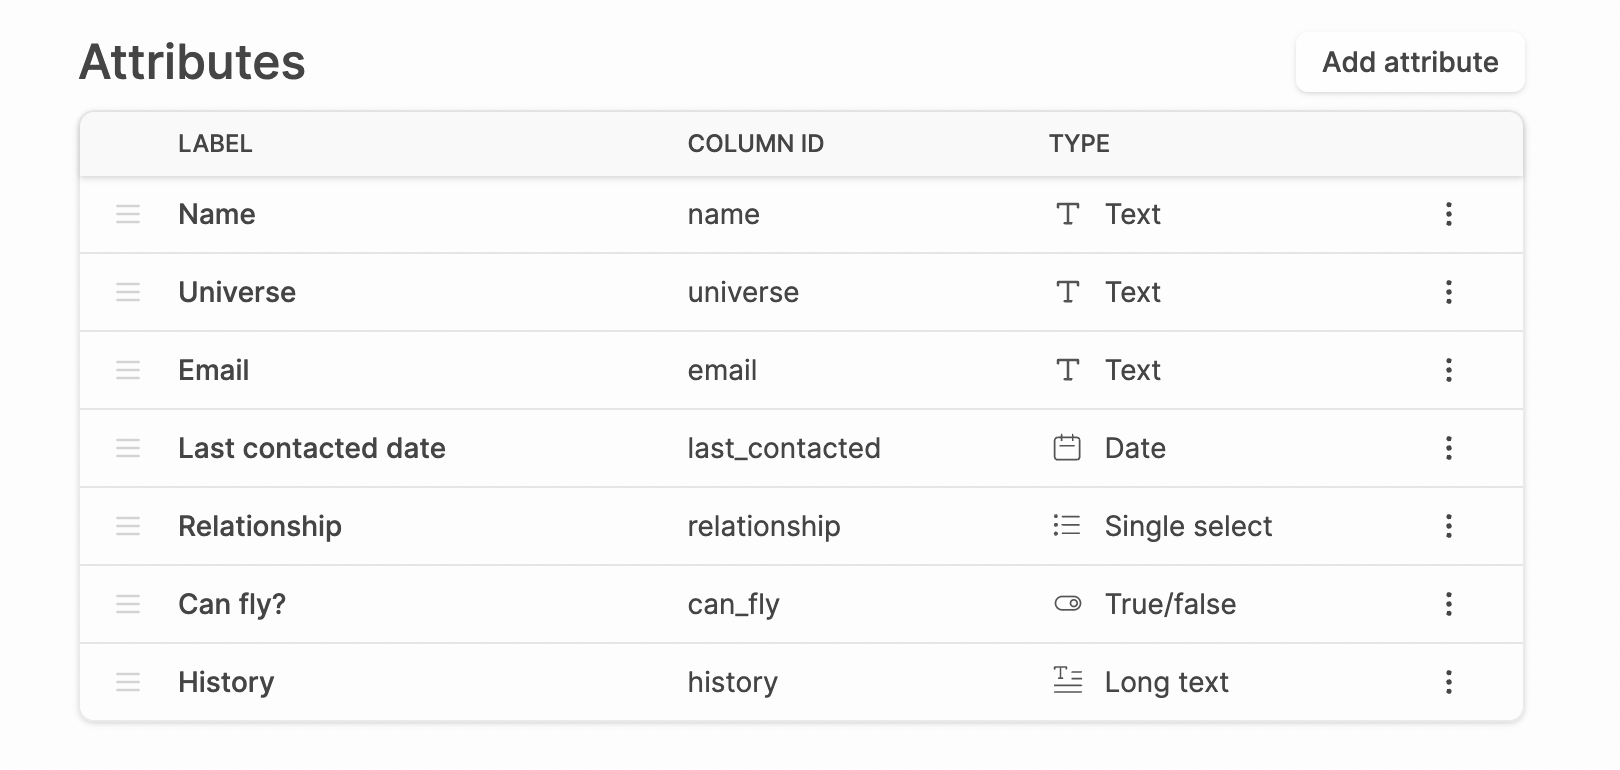
This is what the columns should look like:
Congrats! You have set up the backend of your app.
Step 3. Set up your frontend with Dashibase
Let’s hop over to Dashibase.
When you log in to your new account, you will see an empty dashboard.
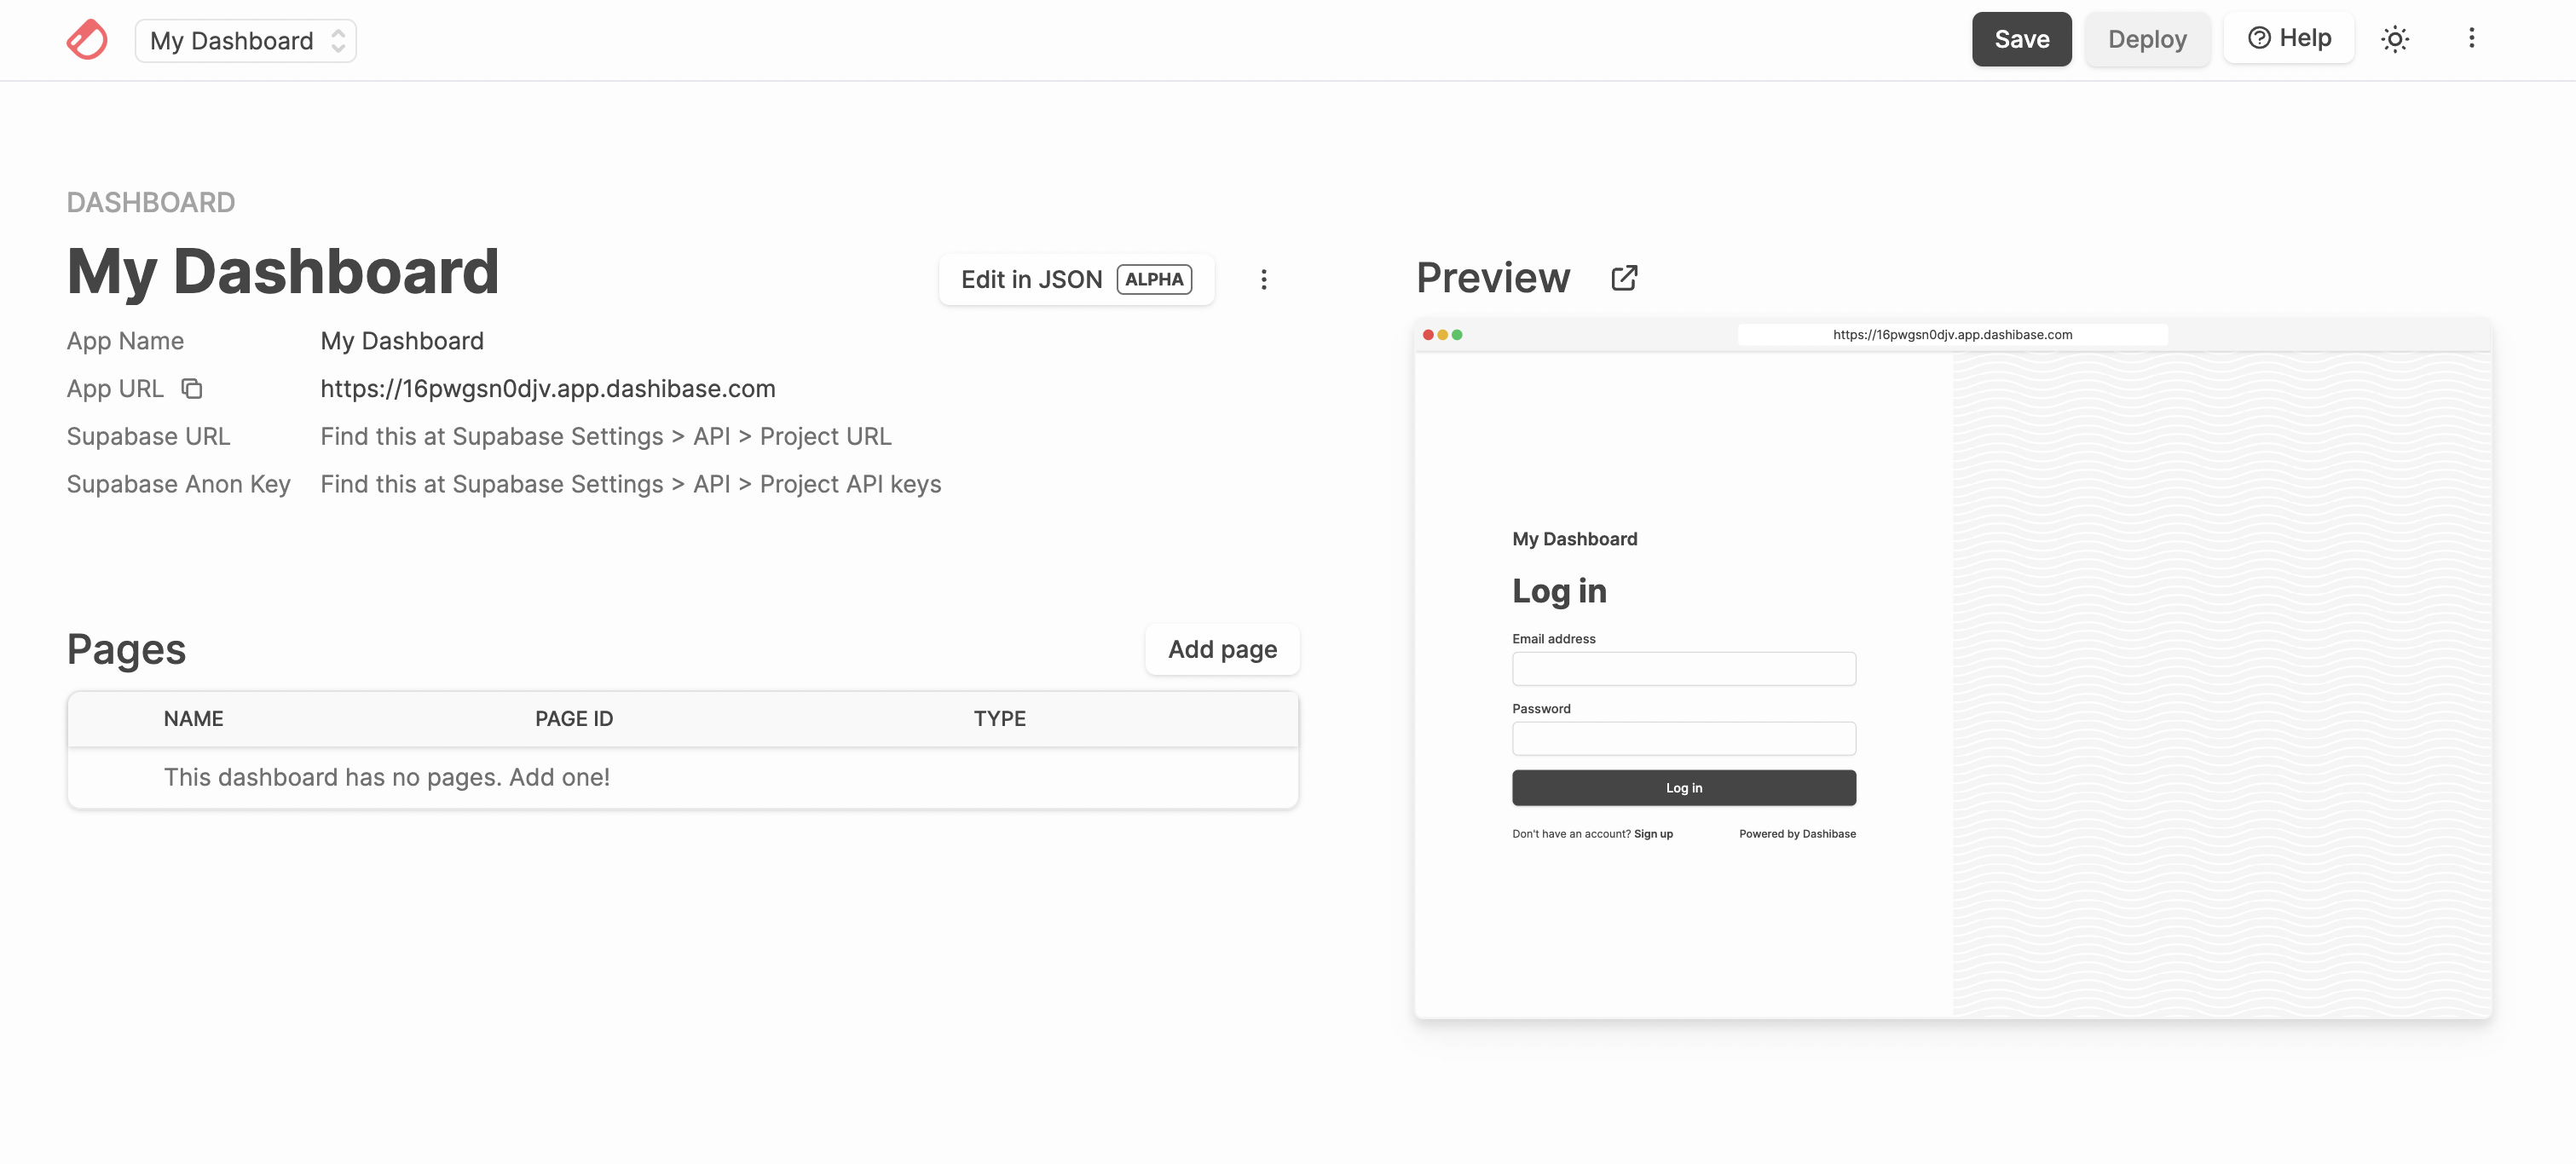
The first things to do are to name our app, pick a URL, and connect our Supabase project. You can find your Supabase URL and Anon Key in your Supabase project > Settings > API.
Connecting your Supabase project to Dashibase is as simple as that.
Next, let’s create a page where our users can view, add, and edit their contacts. Simply click on “Add page”.
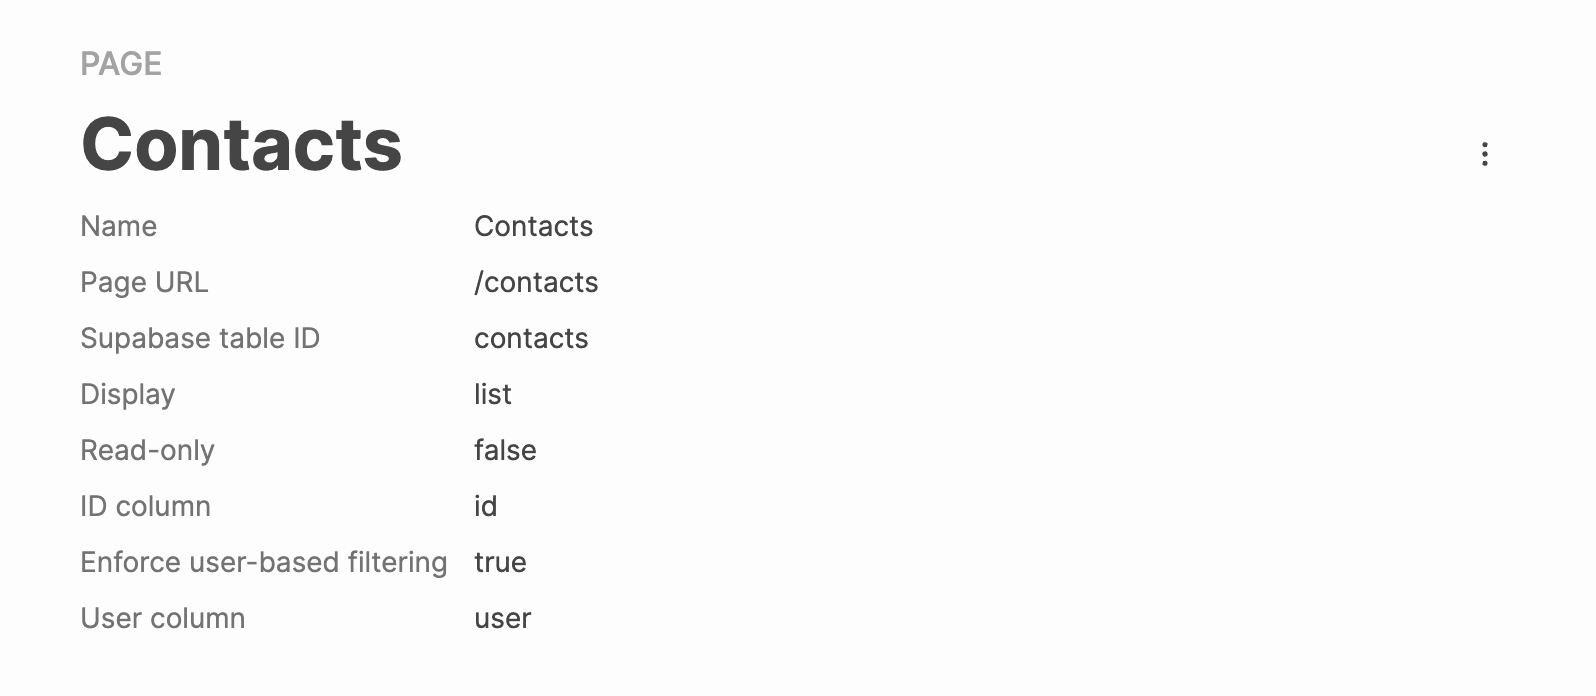
Here are the settings we use for our Contacts page:
- Name: Contacts
- Page URL: /contacts
- Supabase table: contacts (This is automatically pulled from your Supabase project. If you have multiple tables, you can select the relevant one.)
- Display: list (We will display our contacts in a list for now.)
- Read-only: false (Our users should be able to edit their contacts.)
- ID column: id (This is the ID of each contact in our database. If you are not using ‘id’ as your ID column, feel free to change this.)
- User column: user (This is the
usercolumn we created earlier.)
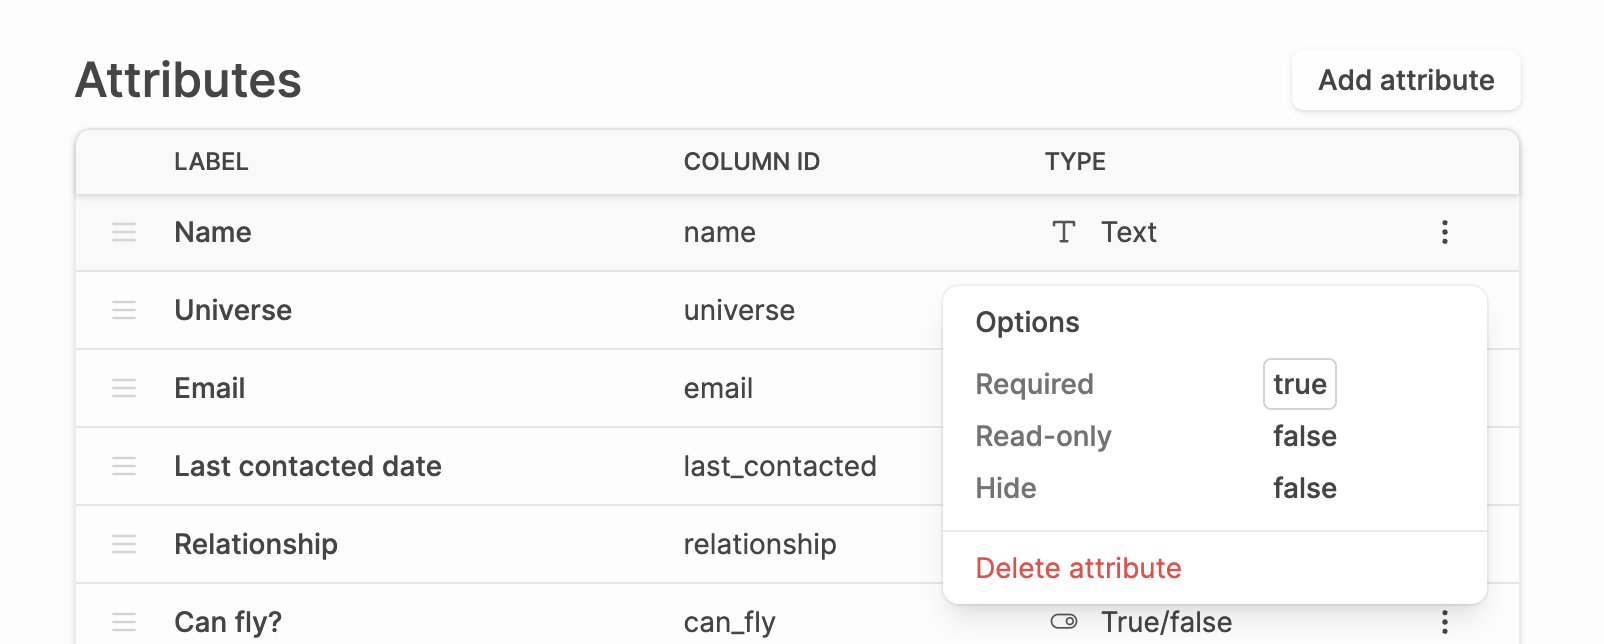
Then, we will add the attributes for each contact so that our users can view or edit them:
- Name (text)
- Universe (text)
- Email (text)
- Last contacted date (date)
- Relationship: Never met, Acquaintance, Close (single select)
- Can he/she fly? (boolean)
- History (long text)
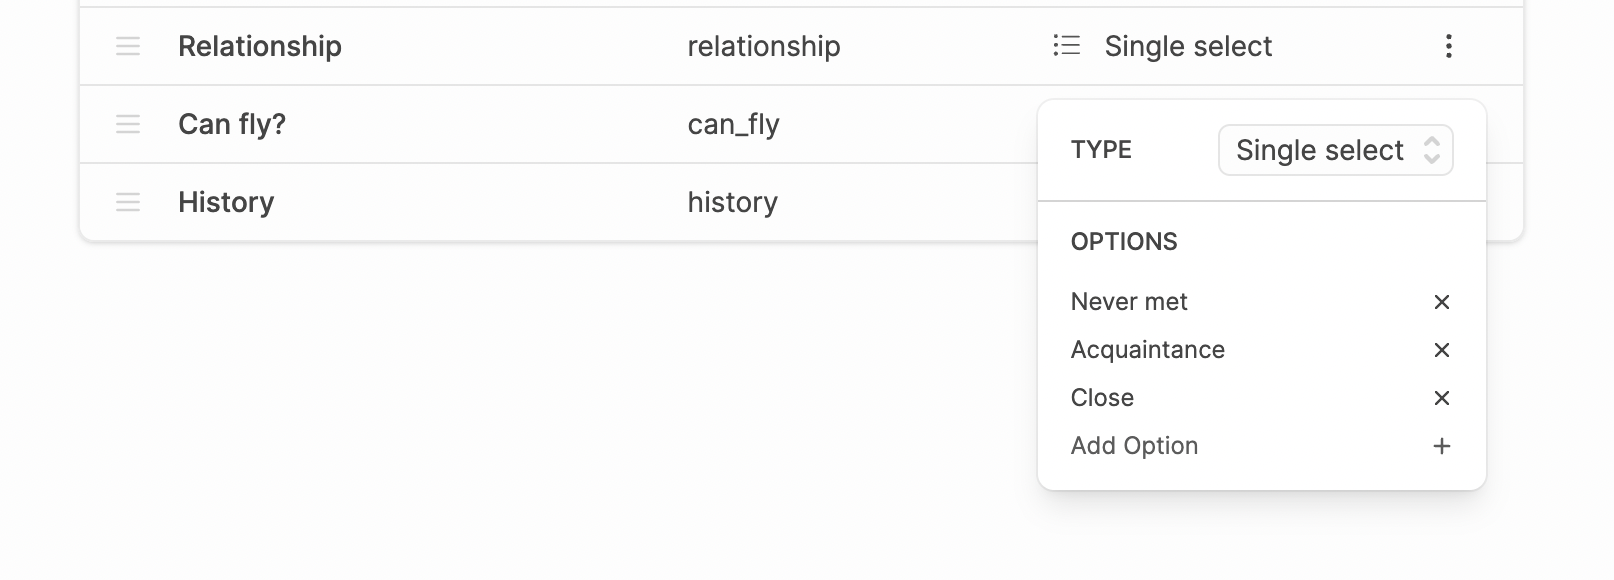
When you use the 'Single Select' type, you will get to add the options you want.
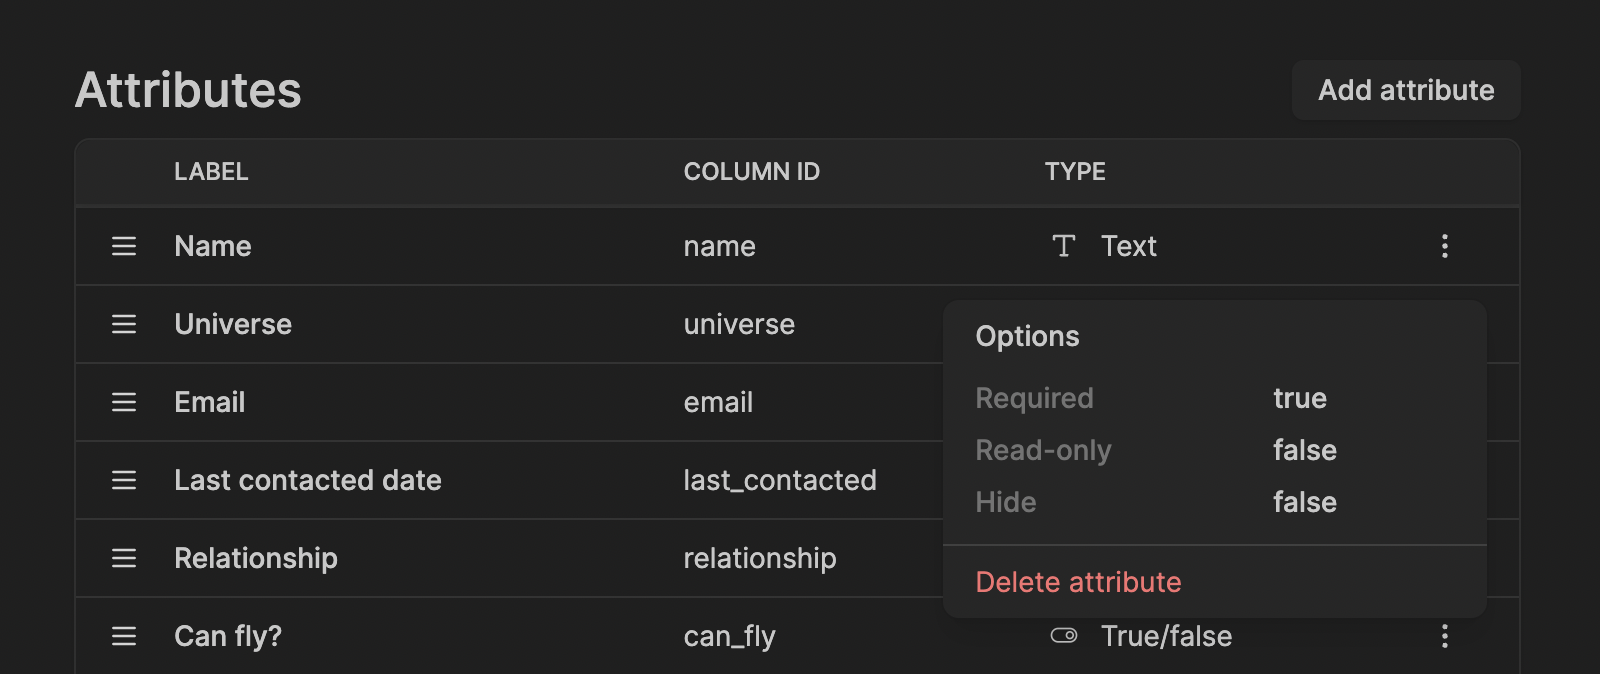
Let’s customize our contacts a little. We will set Name, Universe, and Email as required fields.
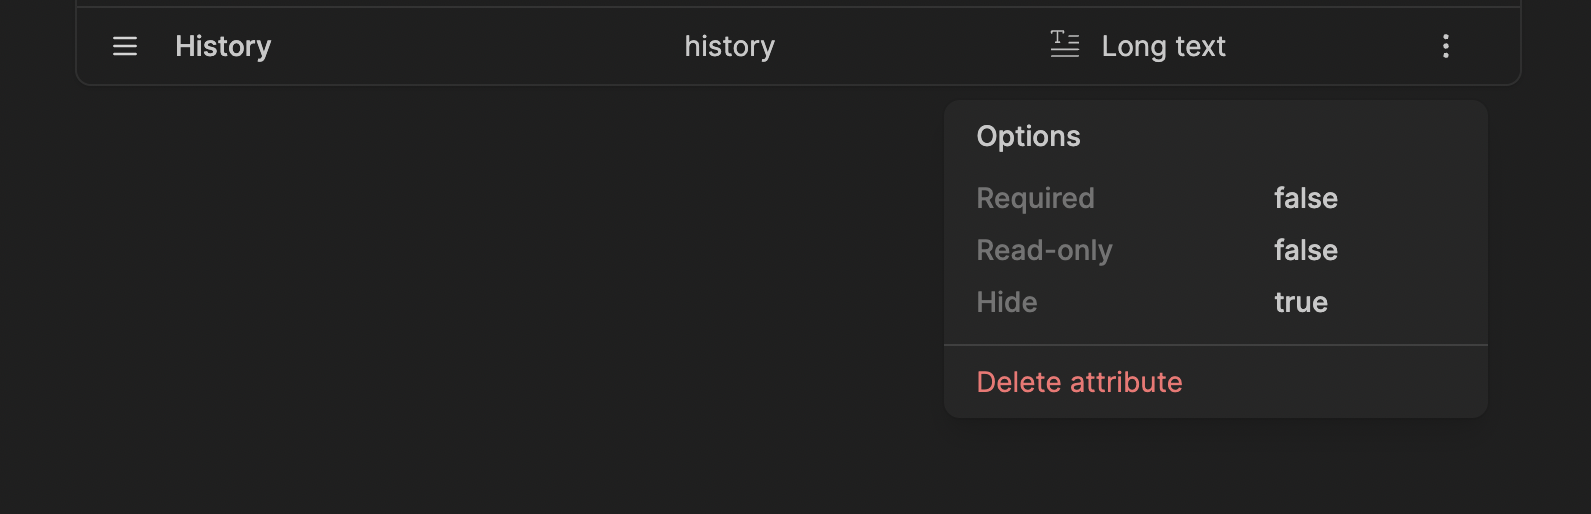
Then, we will hide History from the list because it can get too long. Our users will still be able to view a contact’s history by clicking on the contact in the dashboard.

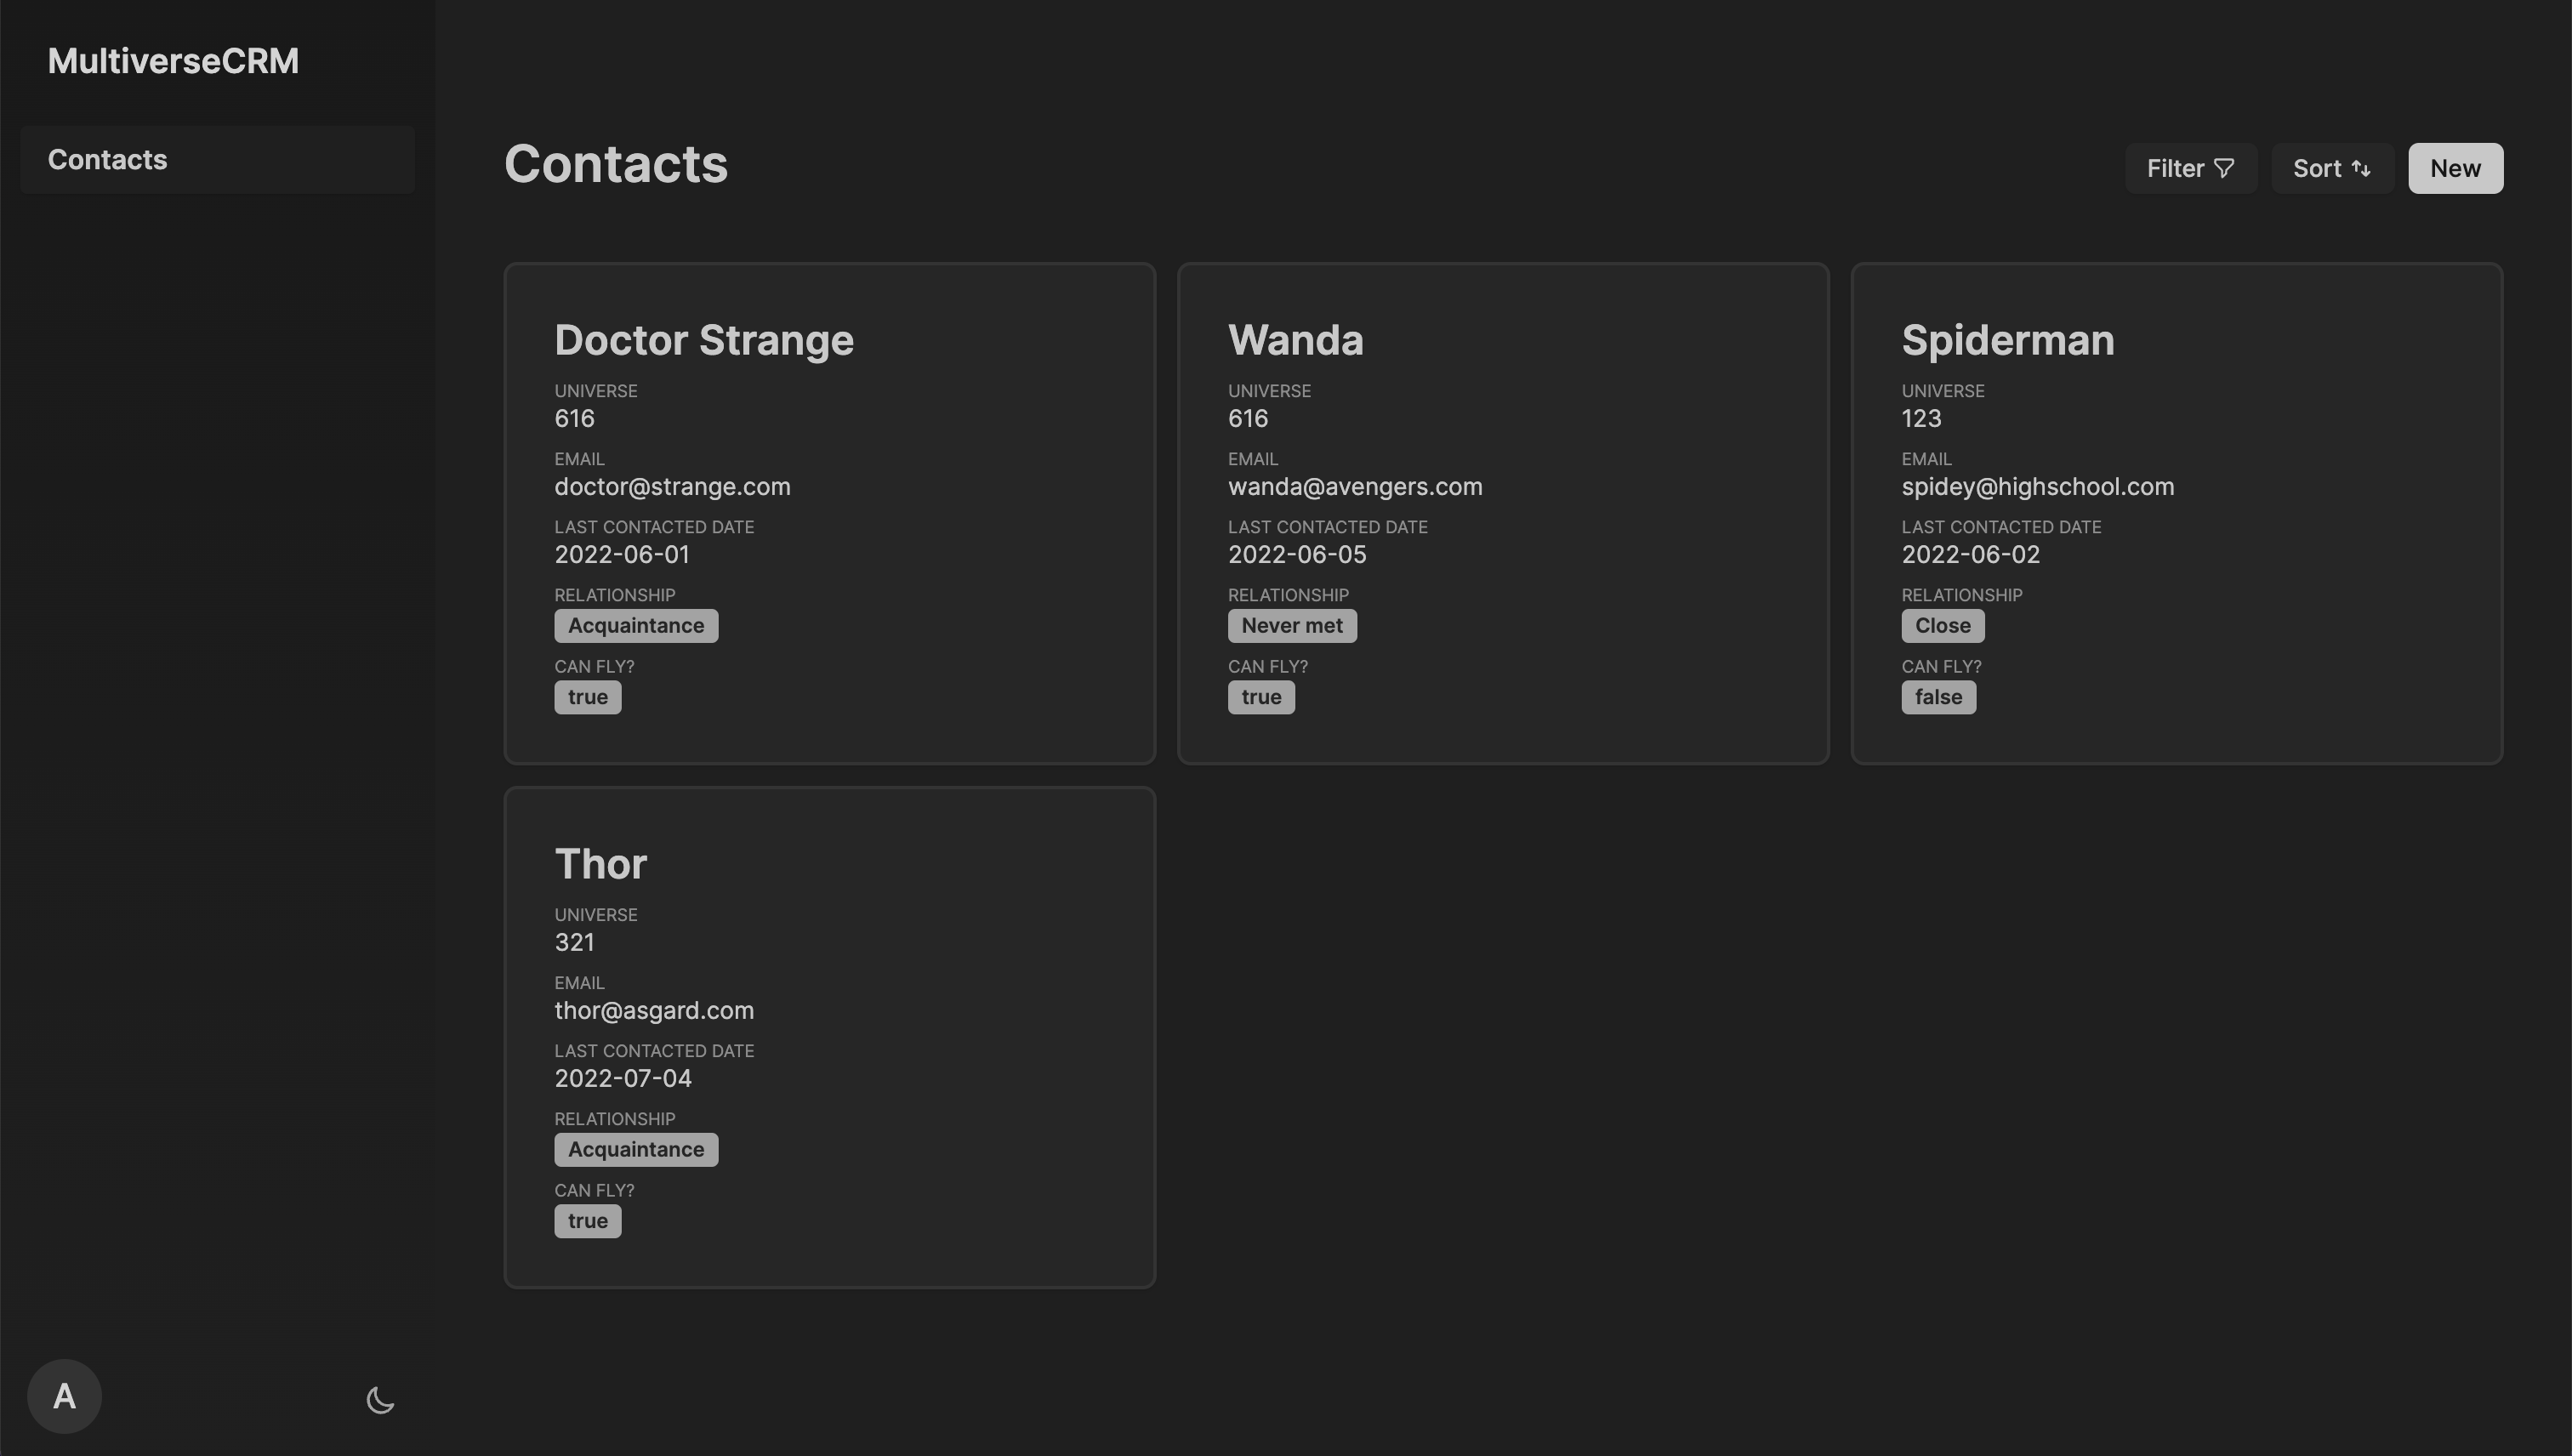
Finally, we will try the card display (under the page settings).
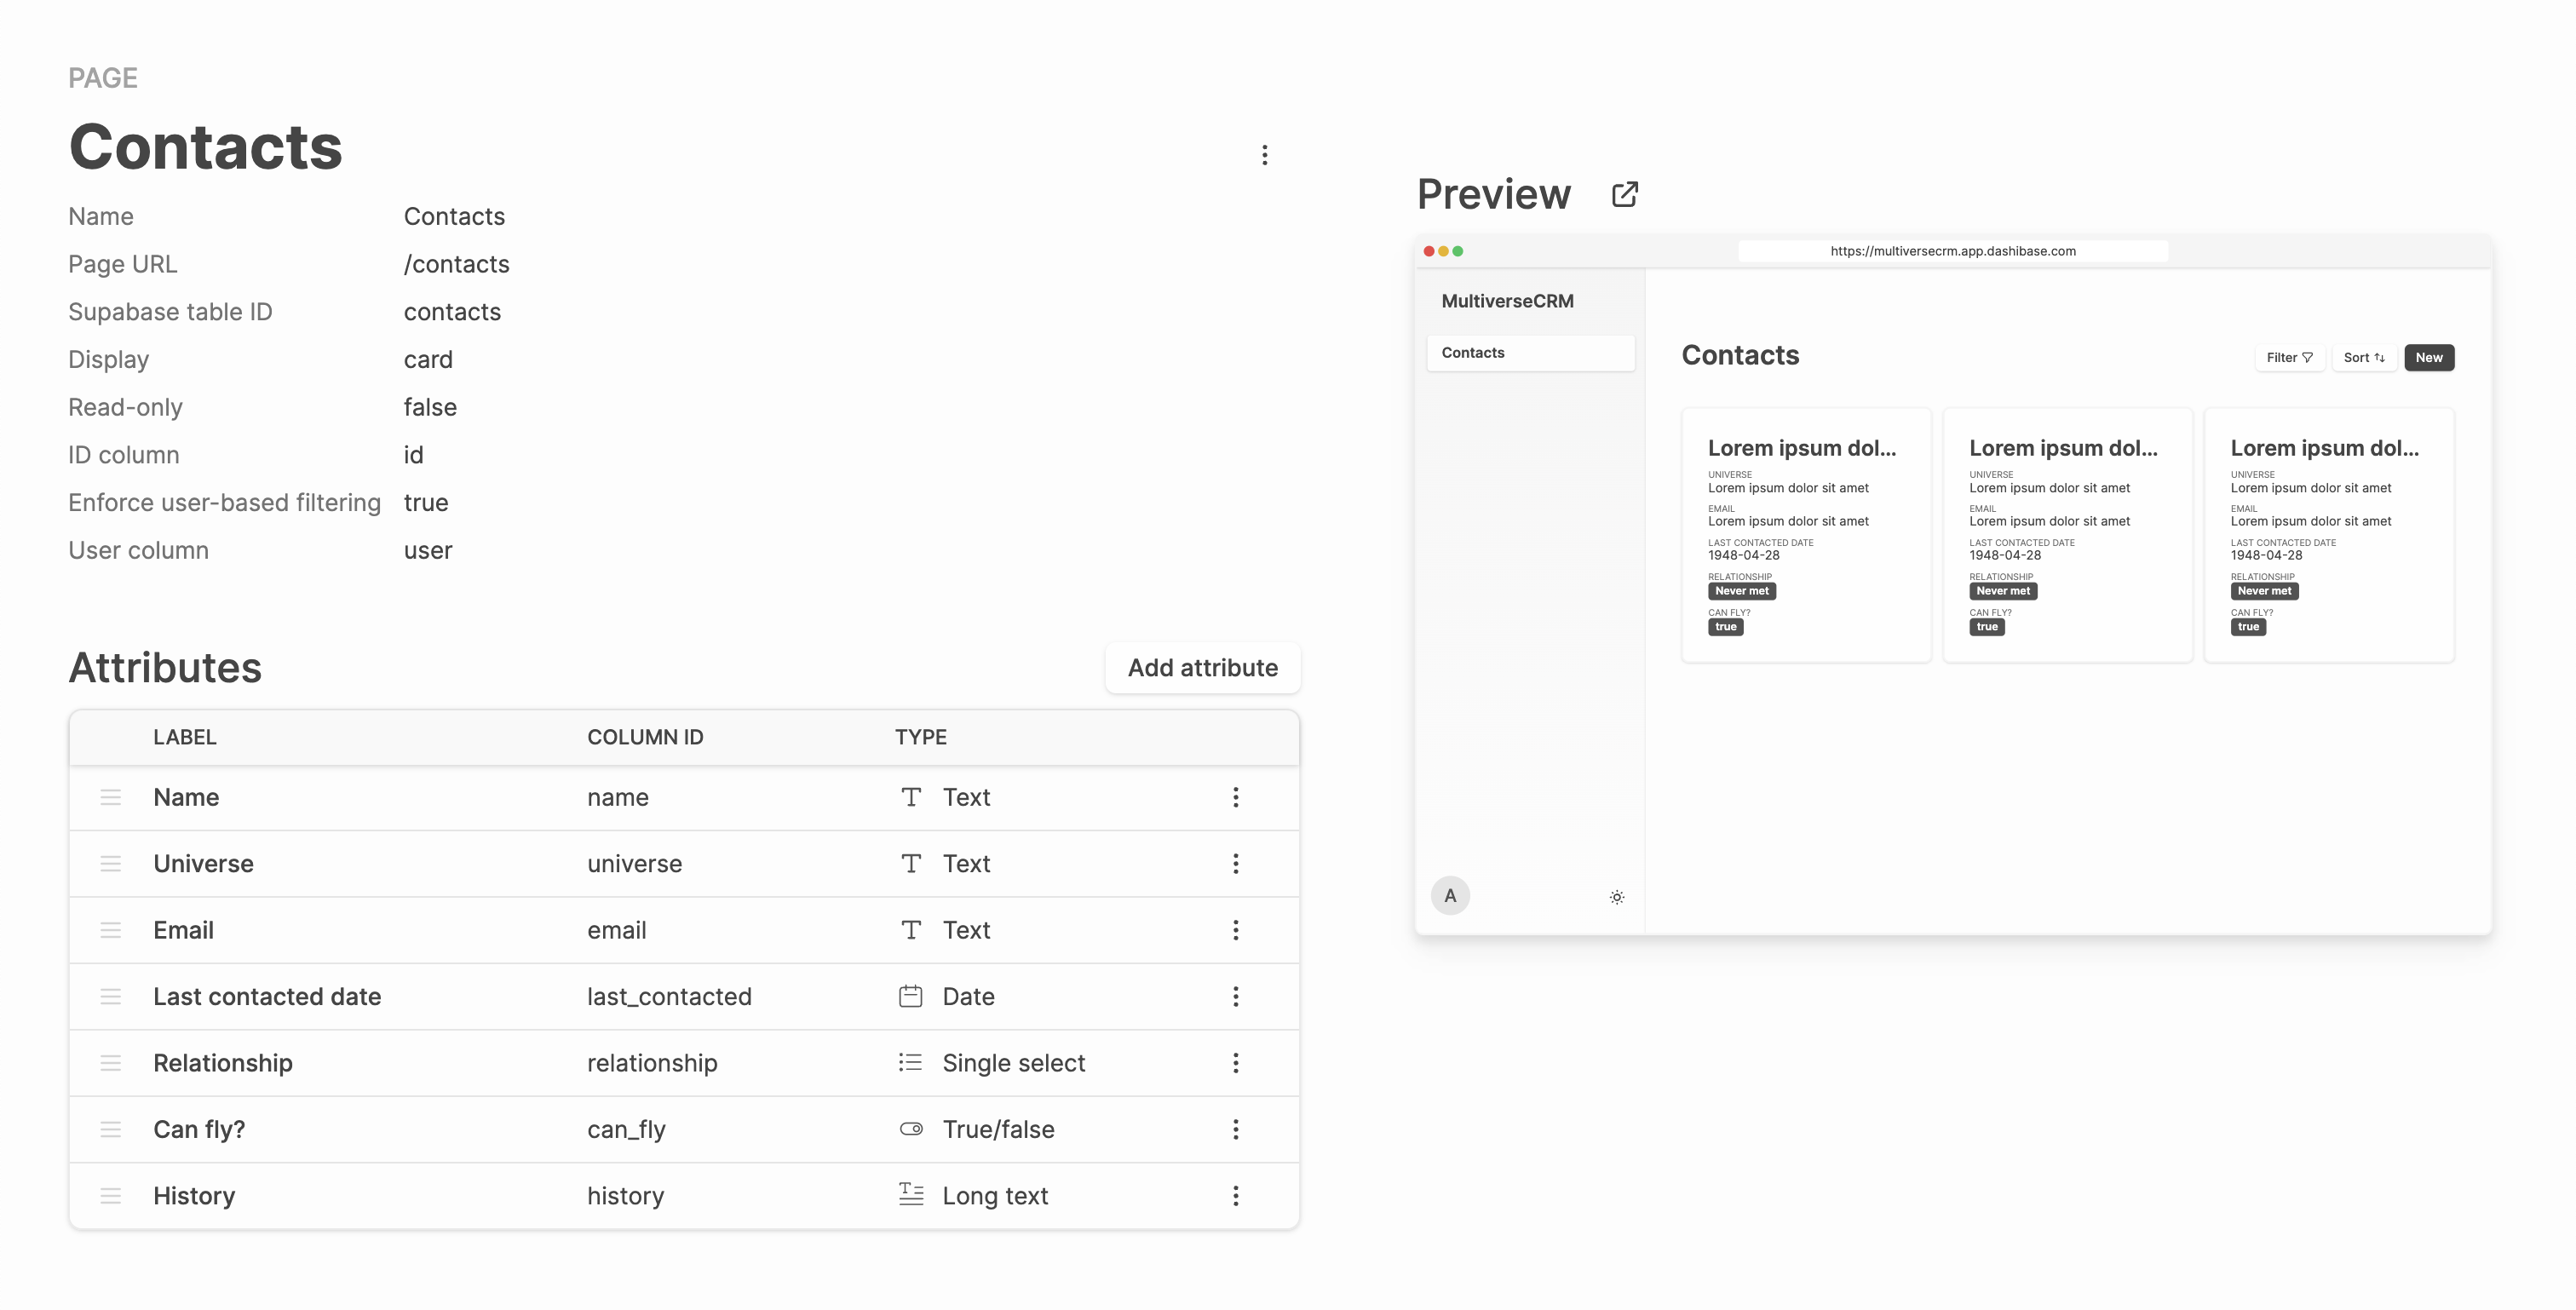
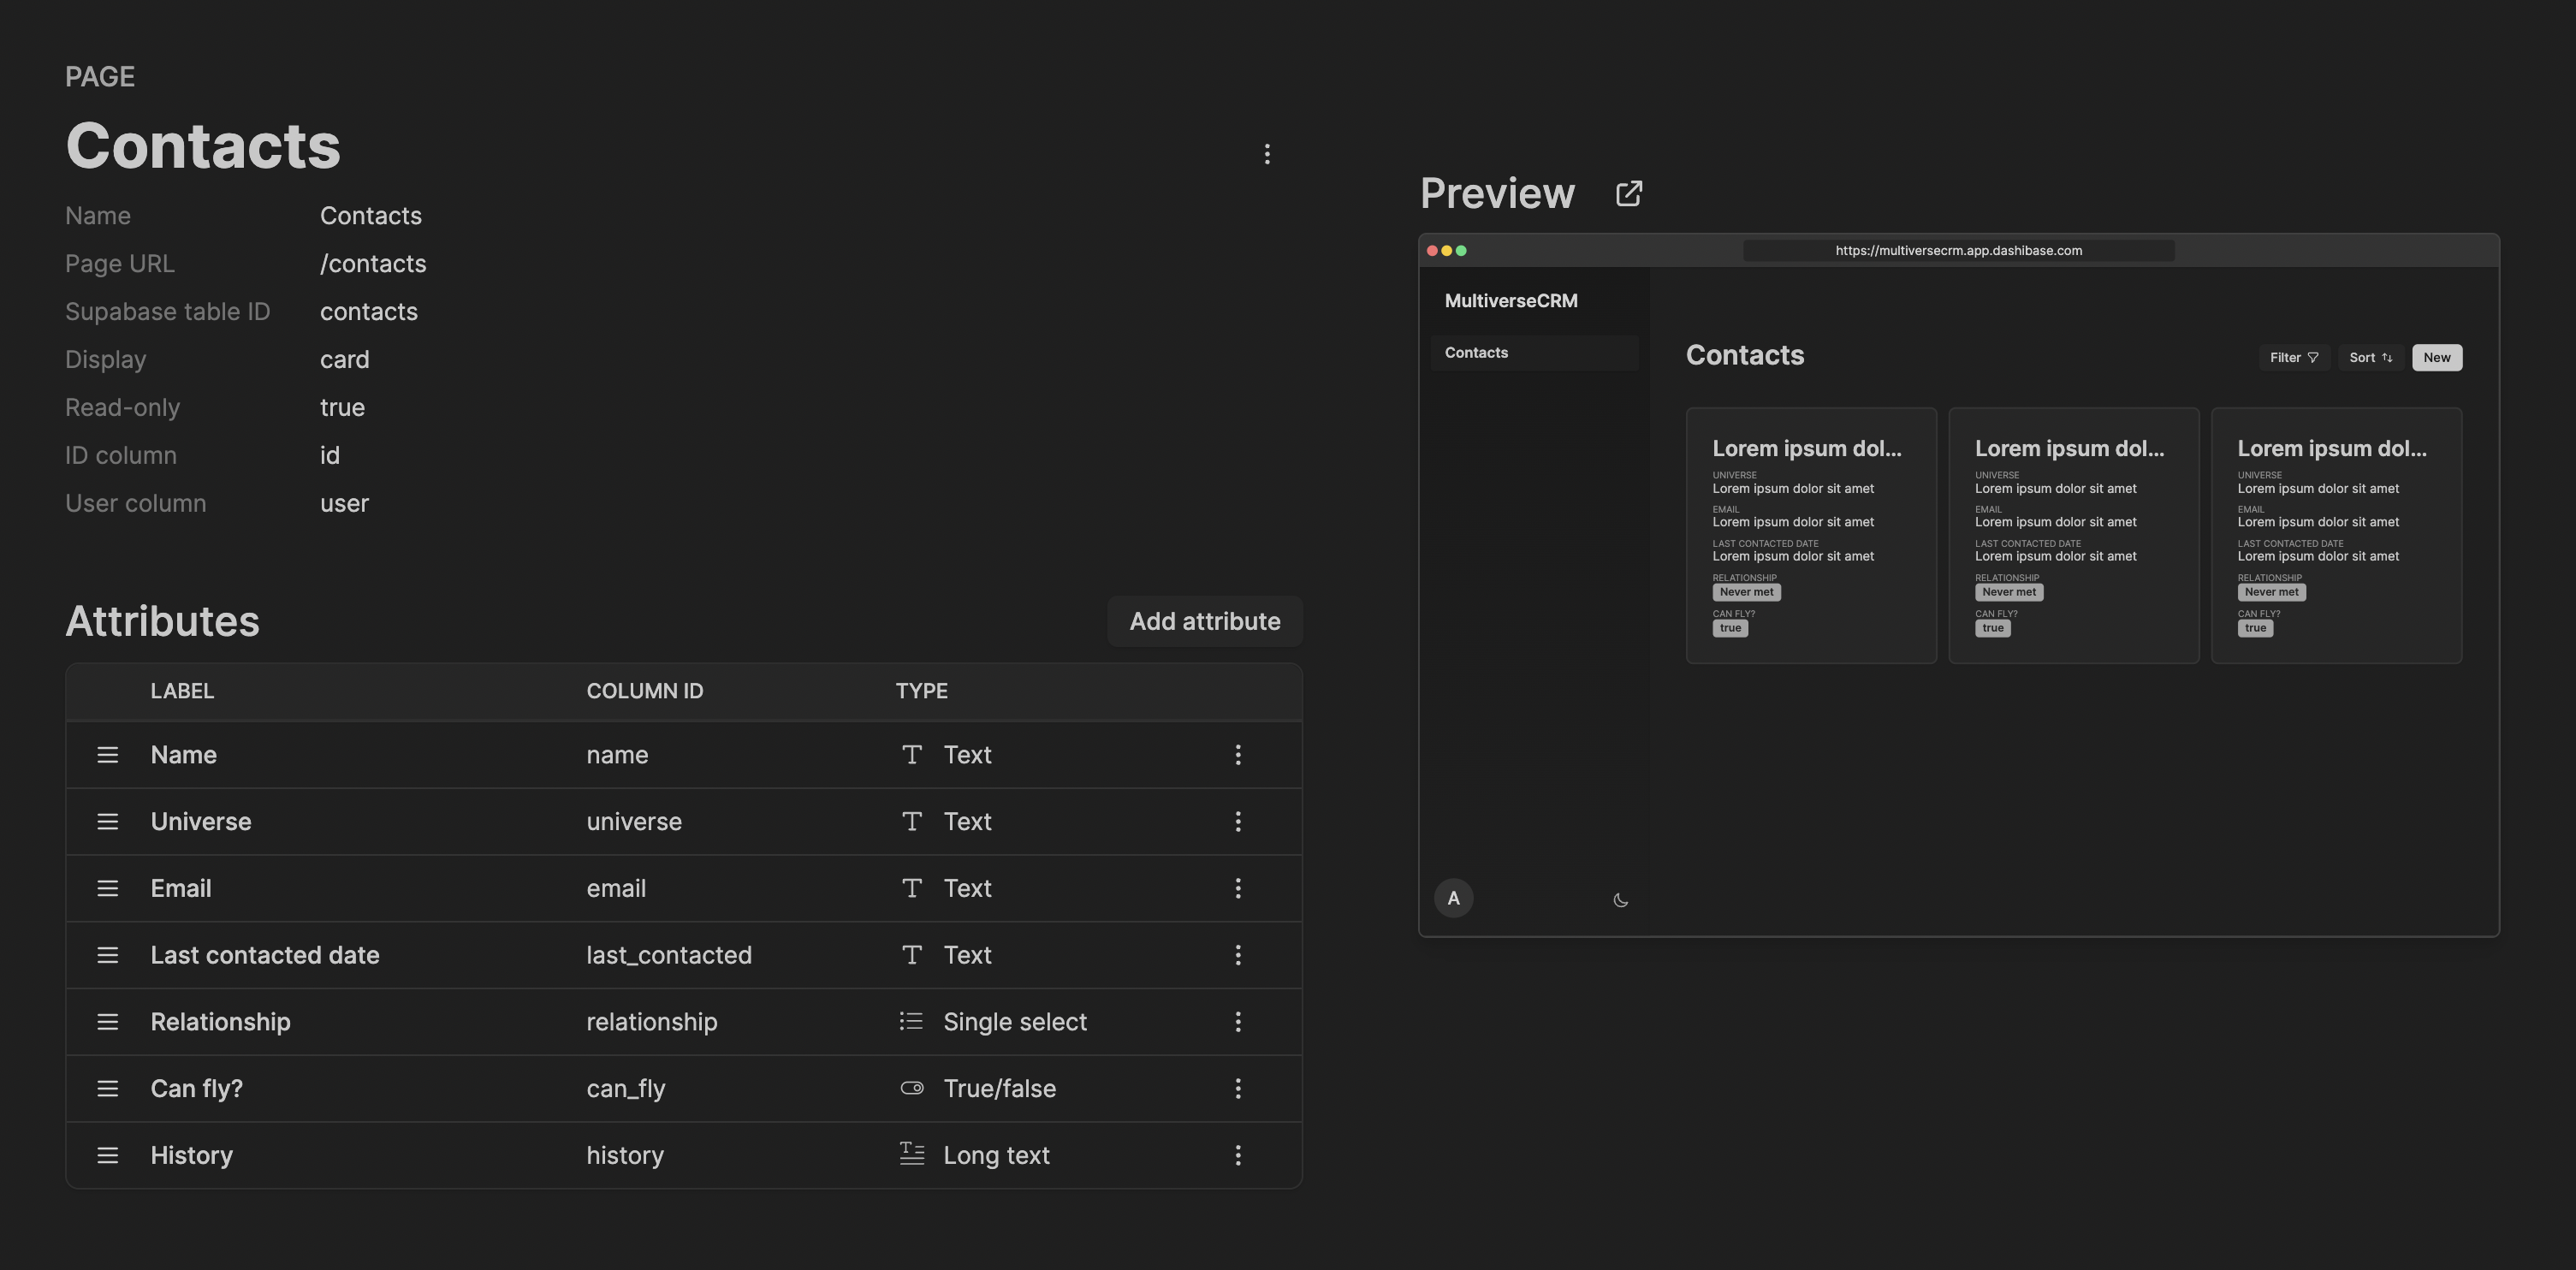
The cards look pretty good in the preview. We will use that for now.
Once done, just hit “Save” and “Deploy”. Your app is now live!
One quick thing: You want to add your app URL to your Supabase project > Settings > Authentication > Additional redirect URLs. This redirects your users to your app when they sign up.


Step 4: Share your app
Your app comes with signup and login pages right out of the box. You don’t have to spend time building that at all.
When you are ready, share your app with your family, friends, and followers!
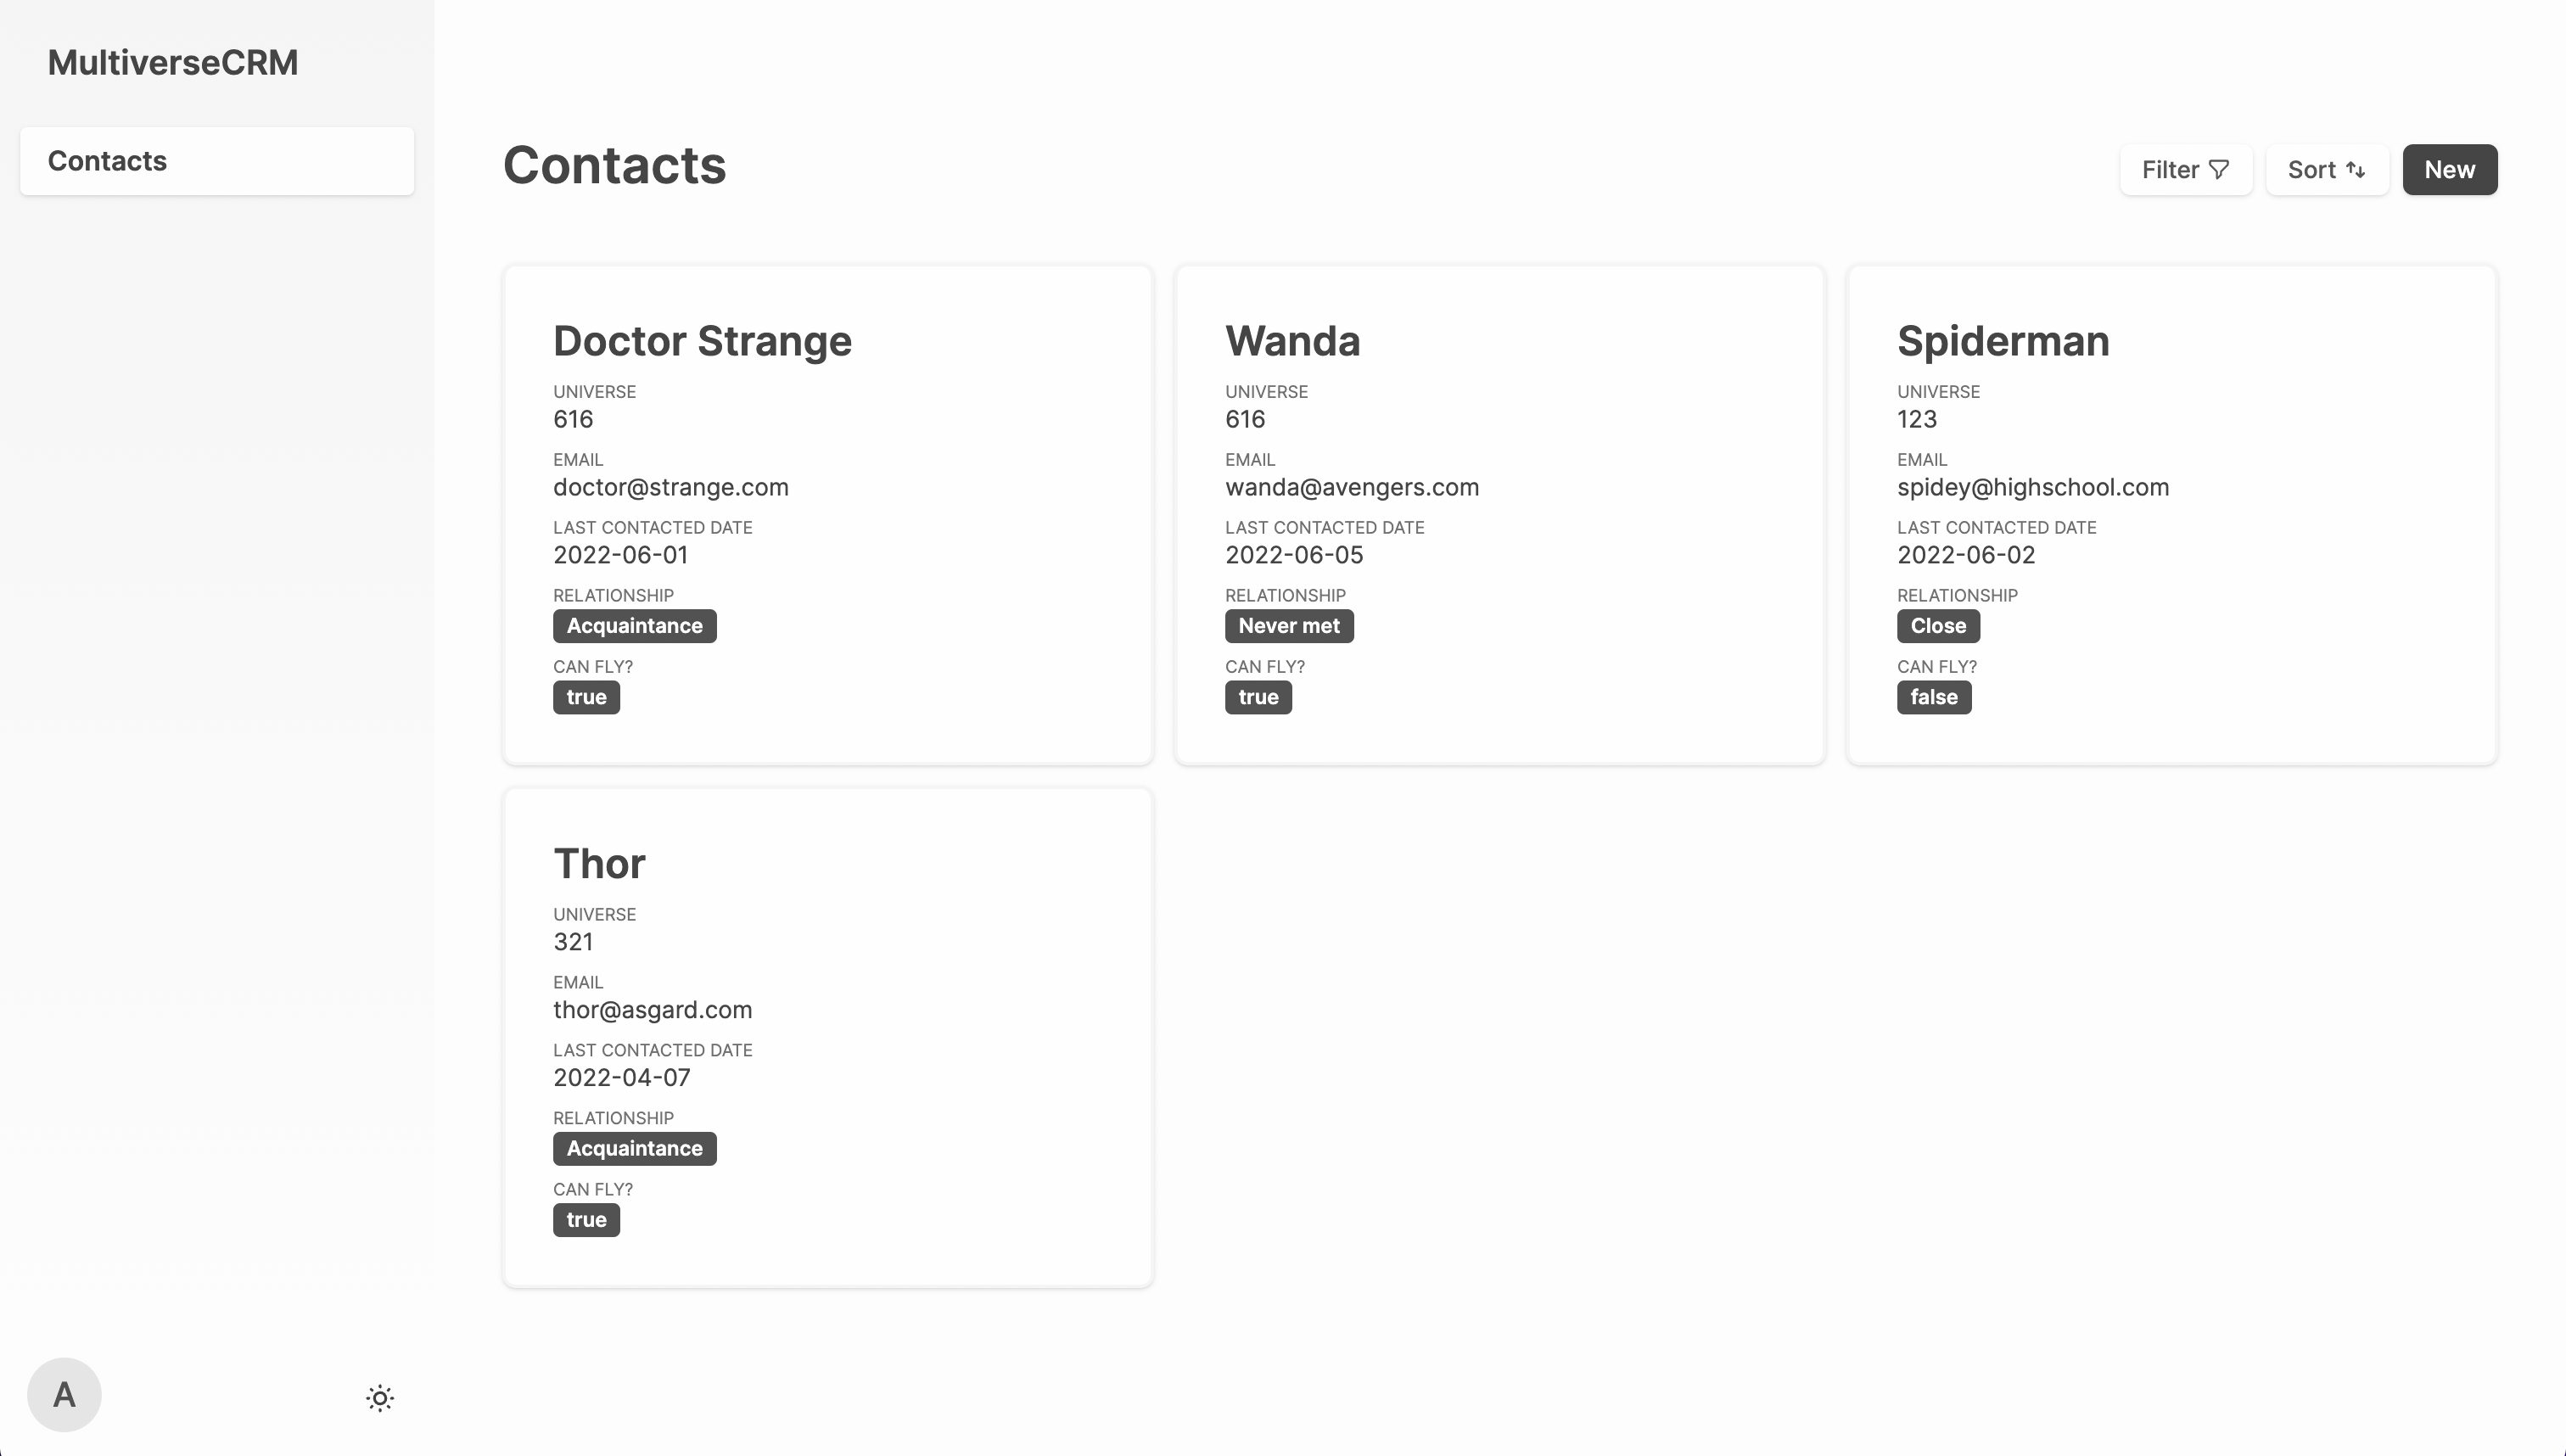
P.S. You can check out our app at https://multiversecrm.app.dashibase.com. You can add new contacts and edit or delete existing contacts. You can also filter or sort to look for certain contacts.
Fun fact: Both Dashibase and apps created with Dashibase have light and dark modes out of the box. Toggle the light/dark mode for this page to see them!